> ## Documentation Index
> Fetch the complete documentation index at: https://docs.keephq.dev/llms.txt
> Use this file to discover all available pages before exploring further.
# Axiom Provider
> Axiom Provider is a class that allows to ingest/digest data from Axiom.
## Authentication
This provider requires authentication.
* **api\_token**: Axiom API Token (required: True, sensitive: True)
* **organization\_id**: Axiom Organization ID (required: False, sensitive: False)
## In workflows
This provider can be used in workflows.
As "step" to query data, example:
```yaml theme={null}
steps:
- name: Query axiom
provider: axiom
config: "{{ provider.my_provider_name }}"
with:
dataset: {value}
datasets_api_url: {value}
organization_id: {value}
startTime: {value}
endTime: {value}
query: {value} # command to execute
```
If you need workflow examples with this provider, please raise a [GitHub issue](https://github.com/keephq/keep/issues).
## Connecting with the Provider
To connect to Axiom, you need to create an API token from your Axiom account. Follow these steps:
1. Log in to your Axiom account.
2. Go to the **API Access** page under the **Settings** menu.
3. Click the **Create Token** button and enter a name for the token.
4. Copy the token value and keep it safe.
5. Add the token value to the `authentication` section in the Axiom Provider configuration.
To access datasets, you need to provide the organization ID. You can find your organization ID in the URL of the Axiom web app. For example, if your Axiom URL is `https://app.axiom.co/organizations/1234`, then your organization ID is `1234`.
## Notes
* This provider supports a limited set of features provided by the Axiom API.
* The `startTime` and `endTime` parameters use ISO-8601 format.
* The `query` function returns the response in JSON format from the Axiom API.
## Webhook Integration
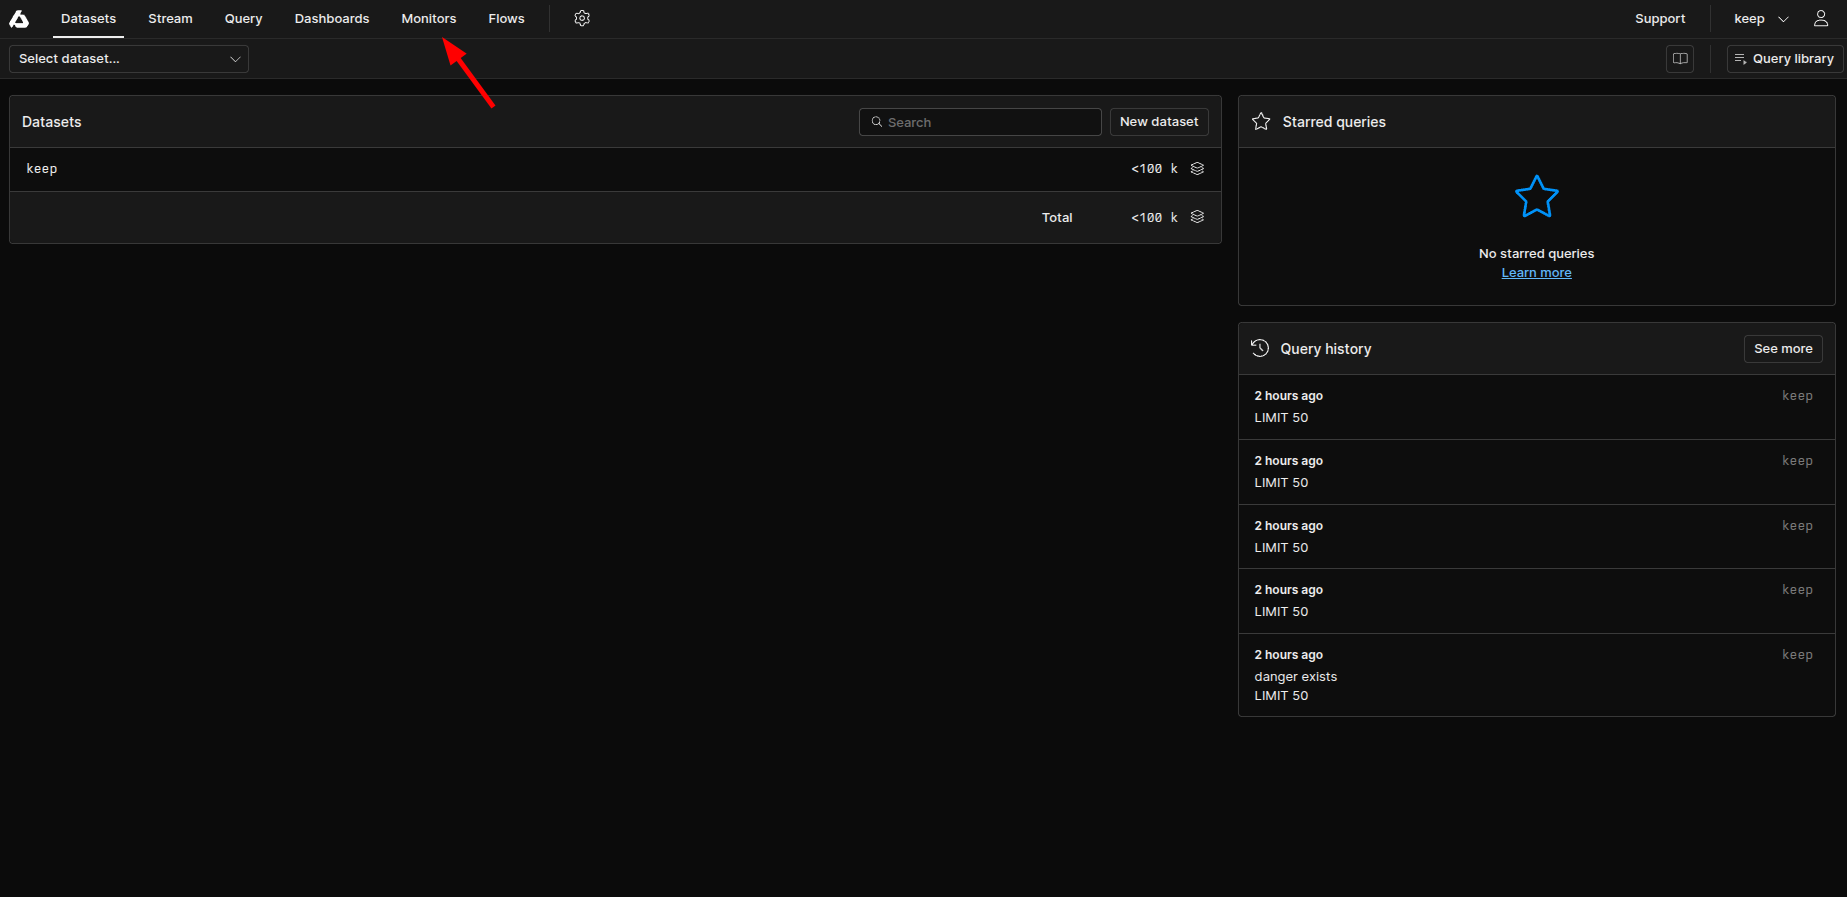
1. In Axiom, go to the `Monitors` tab in the Axiom dashboad.
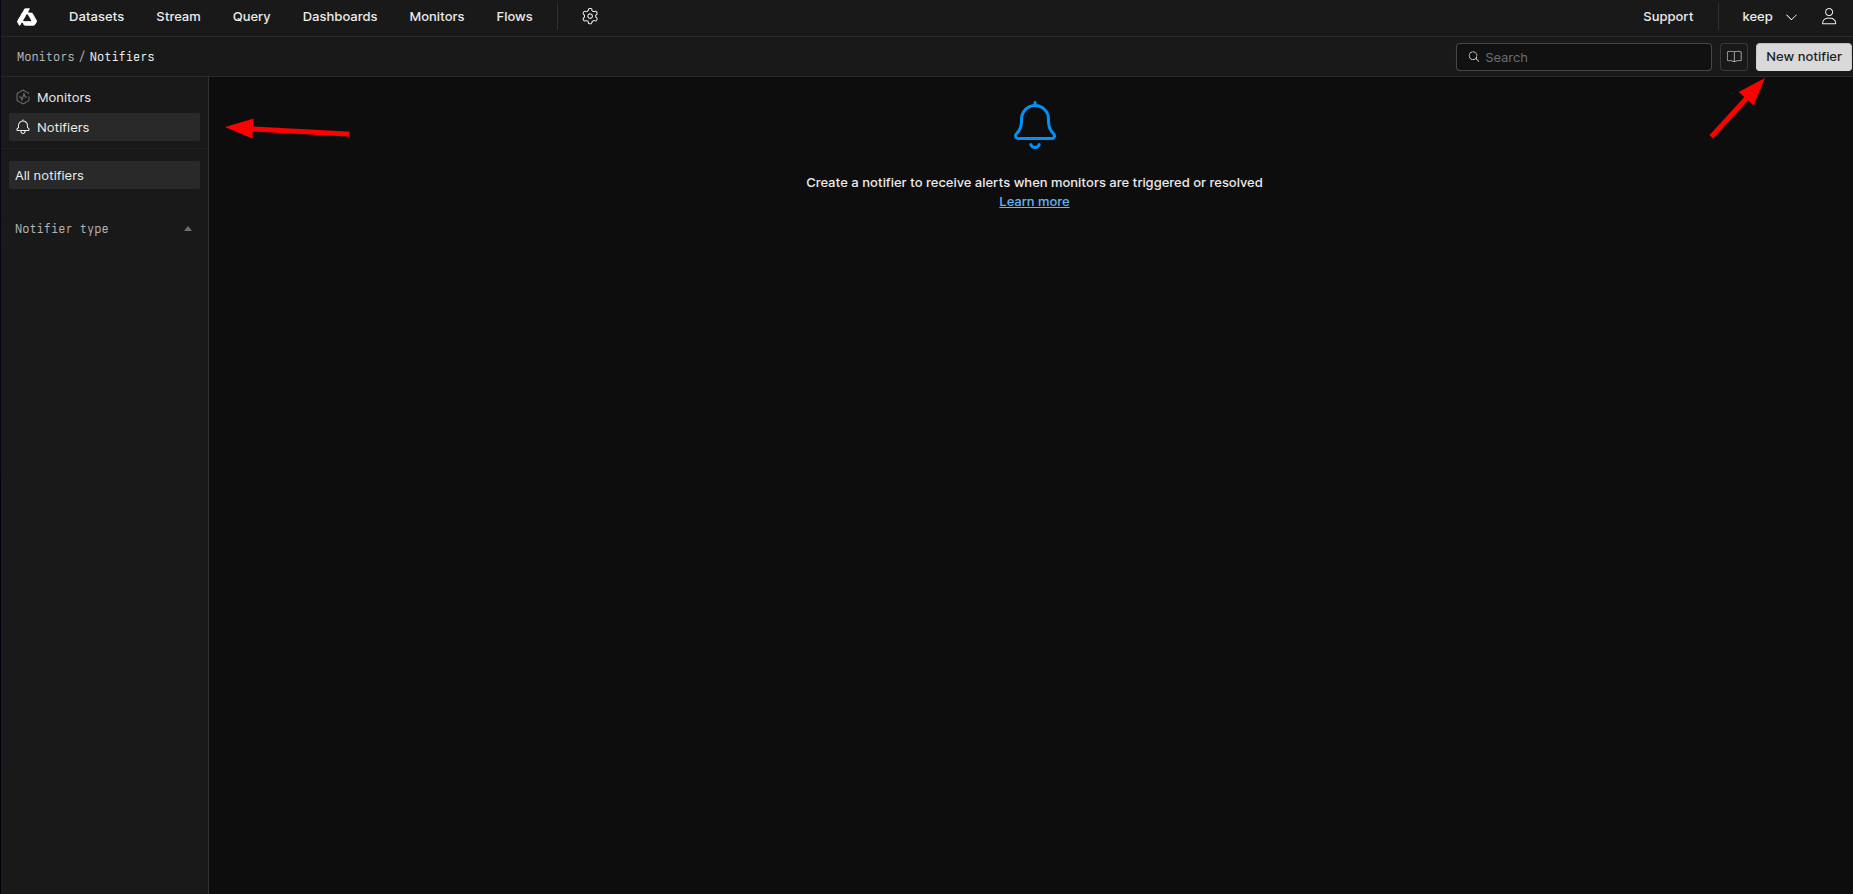
 2. Click on `Notifiers` in the left sidebar and create a new notifier.
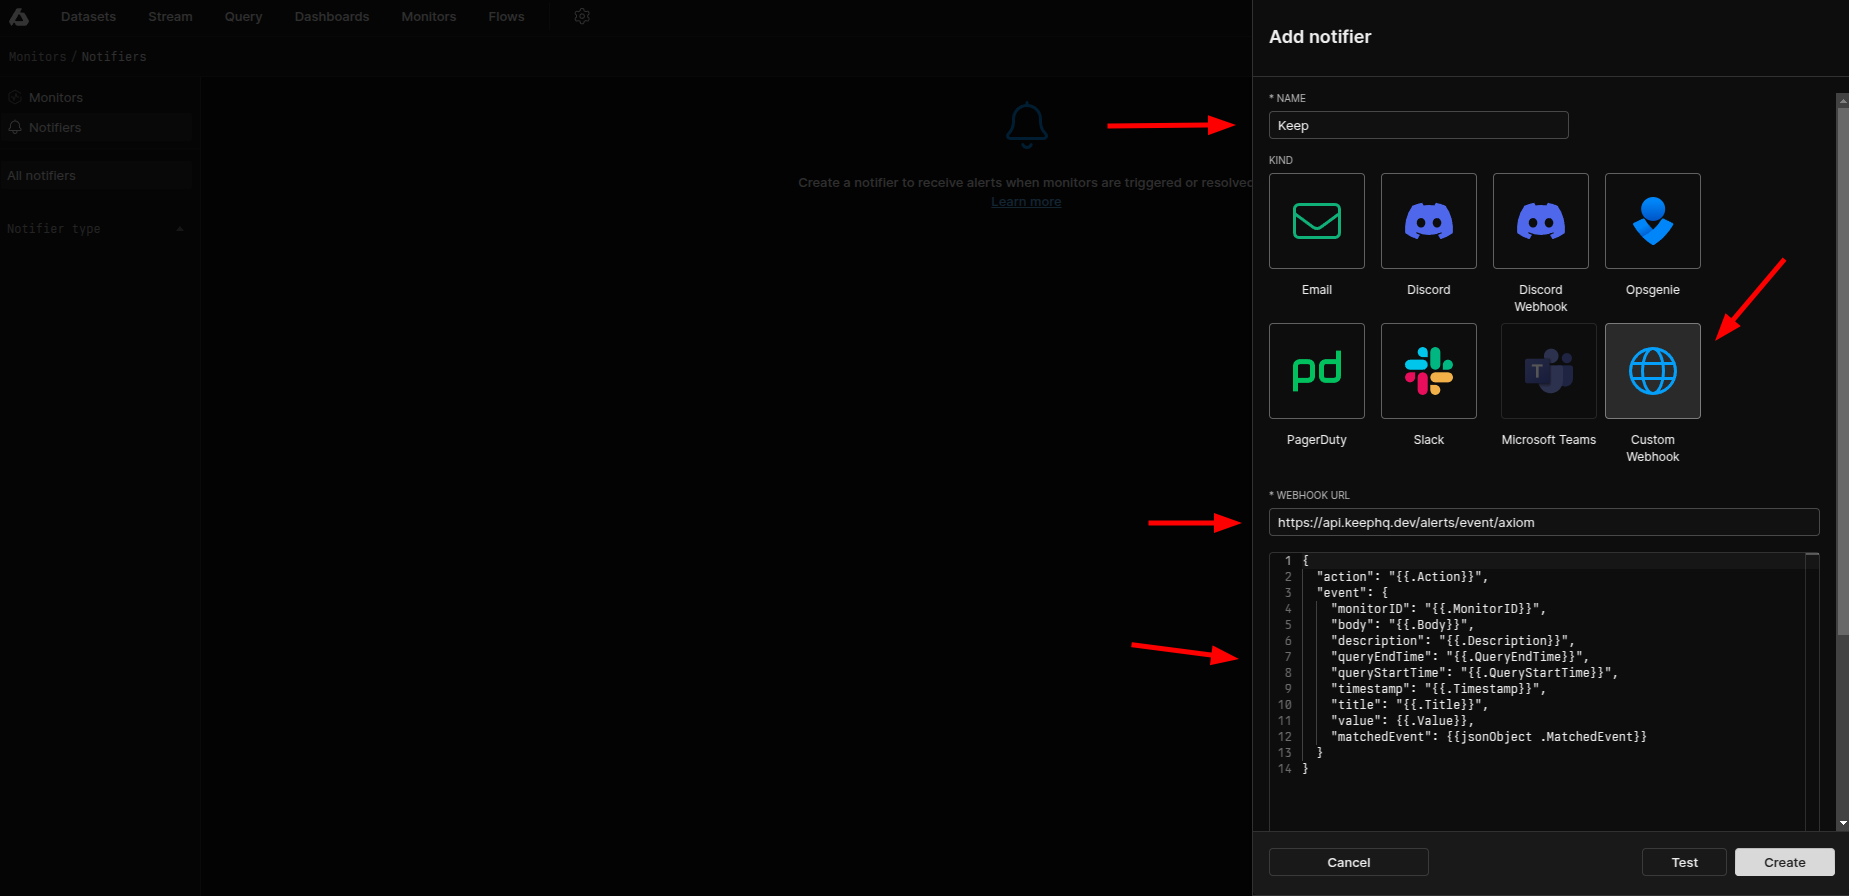
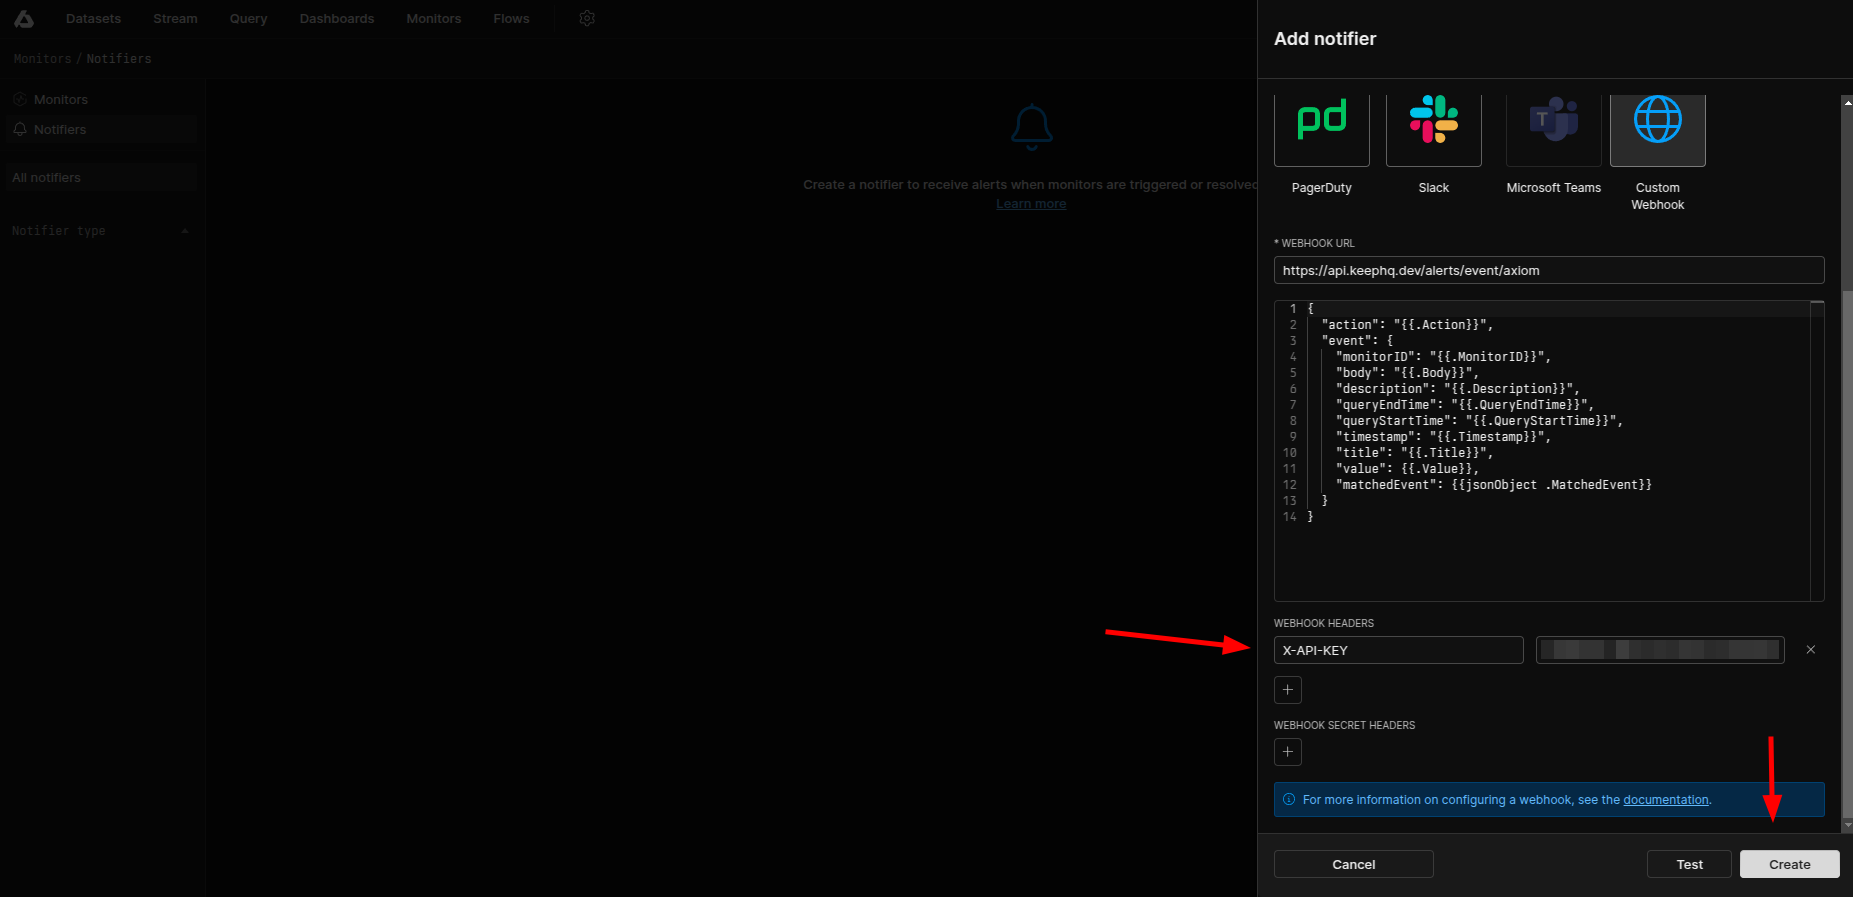
 3. Give it a name and select `Custom Webhook` as kind of notifier. Enter the webhook url as [https://api.keephq.dev/alerts/event/axiom](https://api.keephq.dev/alerts/event/axiom).
 4. Follow the below steps to create a new API key in Keep.
5. Go to Keep dashboard and click on the profile icon in the botton left corner and click `Settings`.
4. Follow the below steps to create a new API key in Keep.
5. Go to Keep dashboard and click on the profile icon in the botton left corner and click `Settings`.
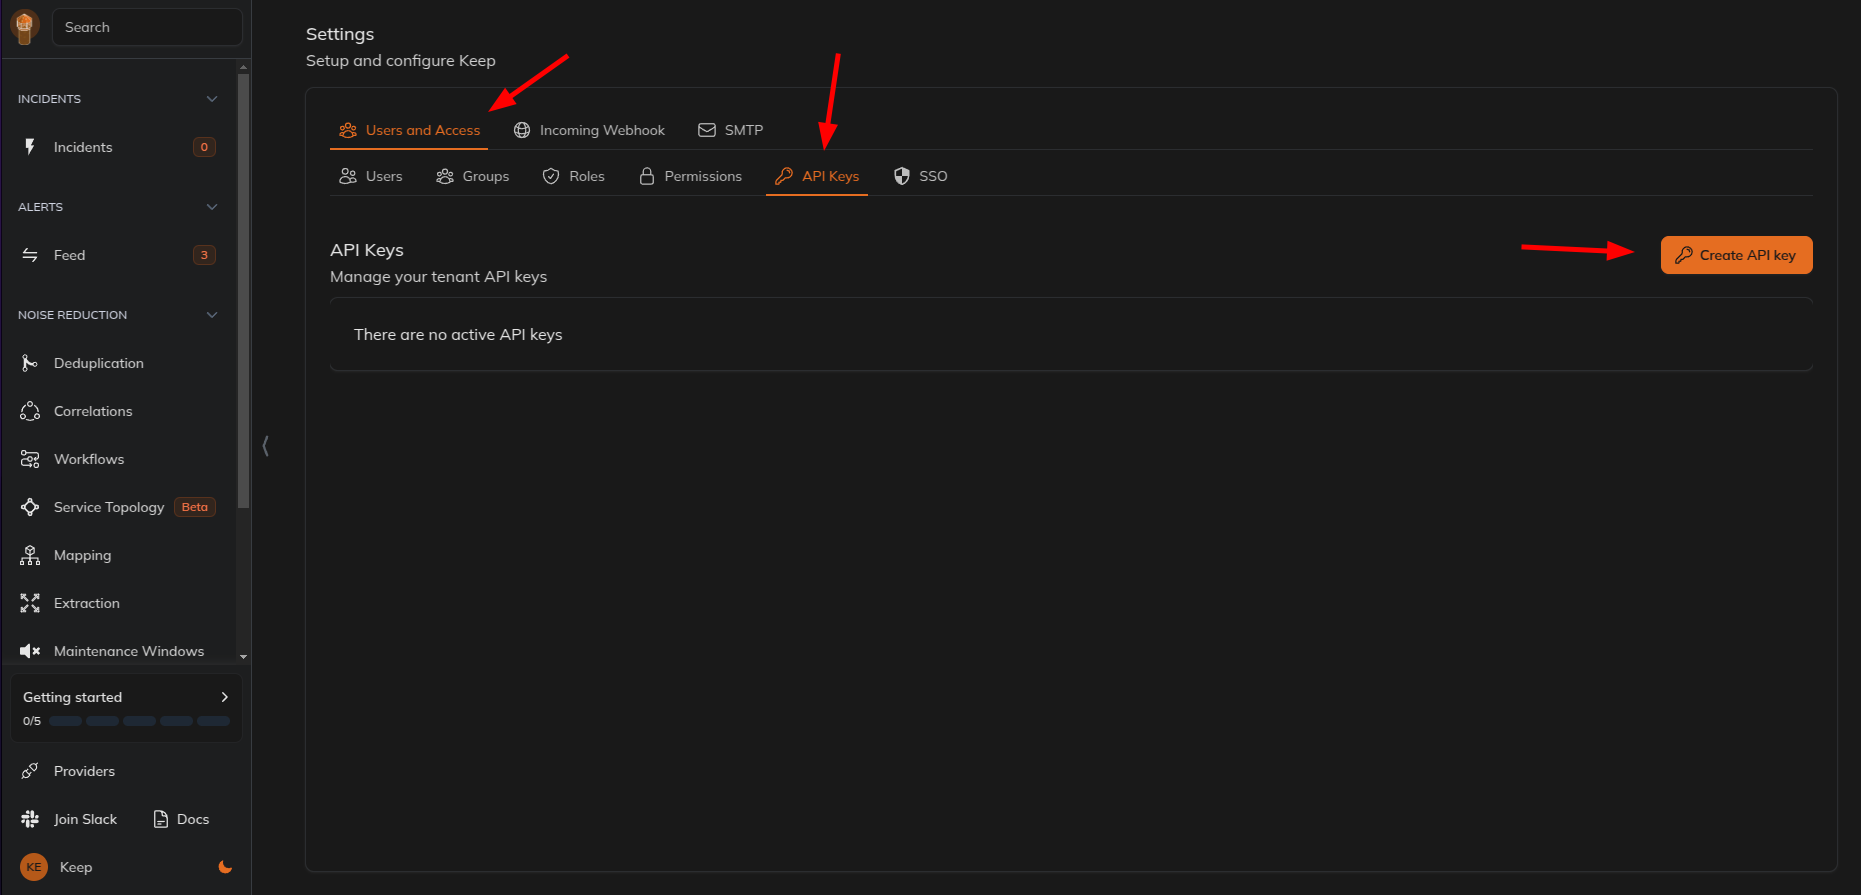
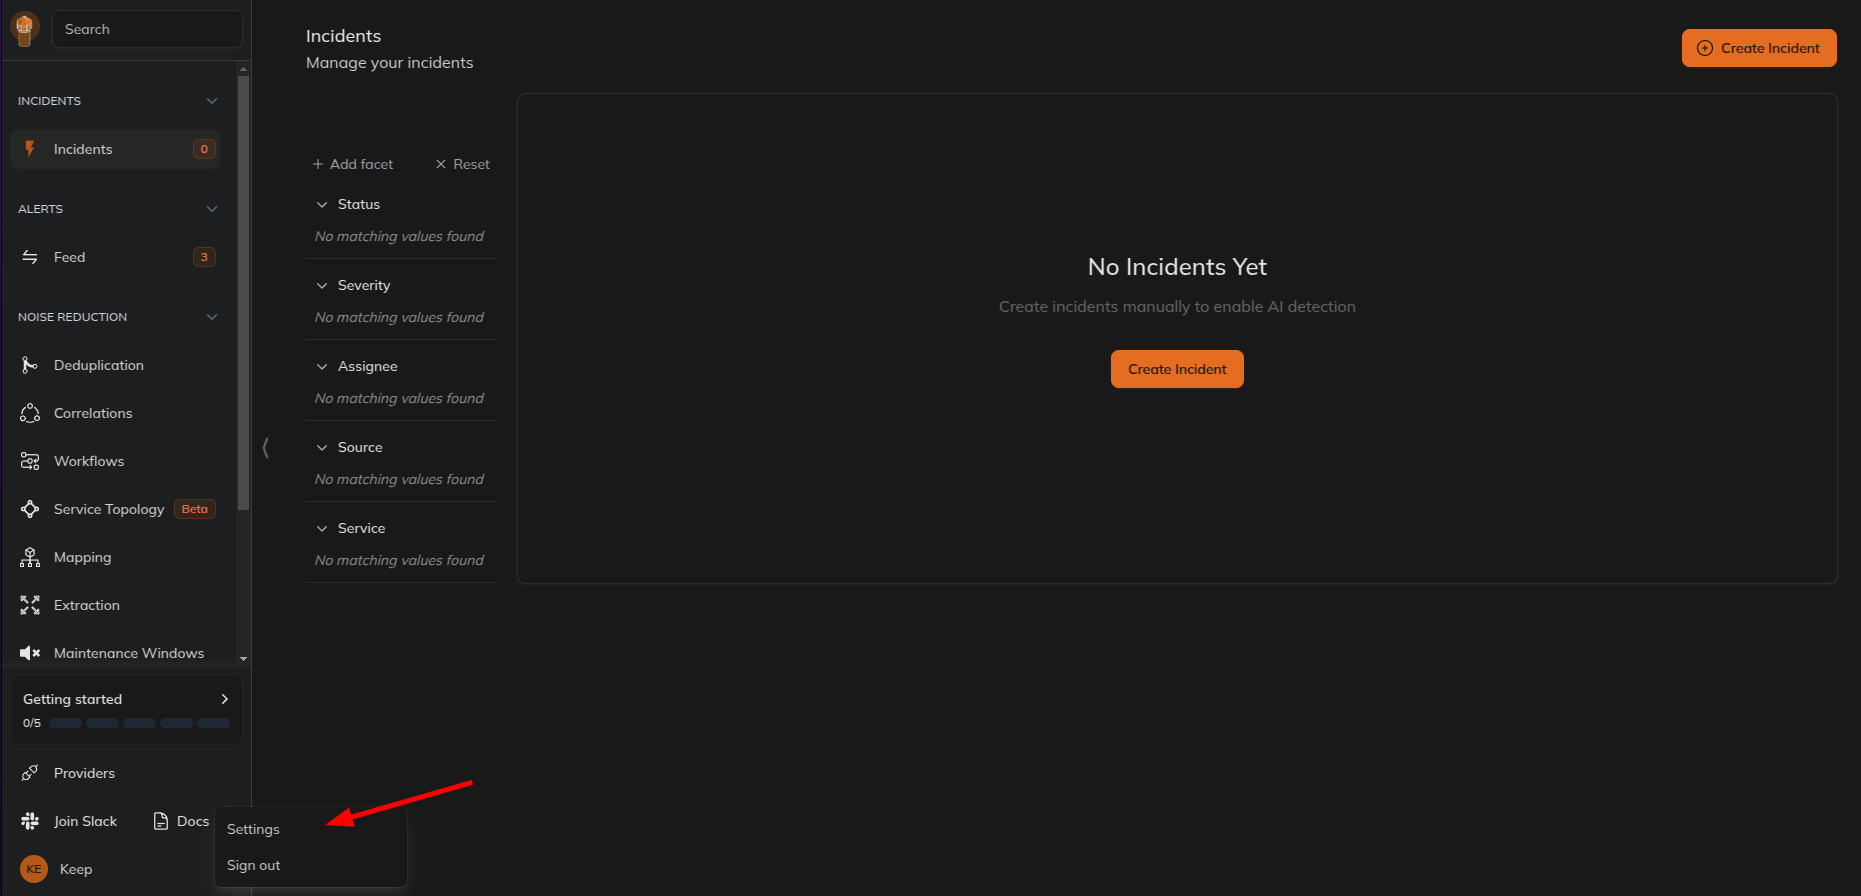 6. Select `Users and Access` tab and then select `API Keys` tab and create a new API key.
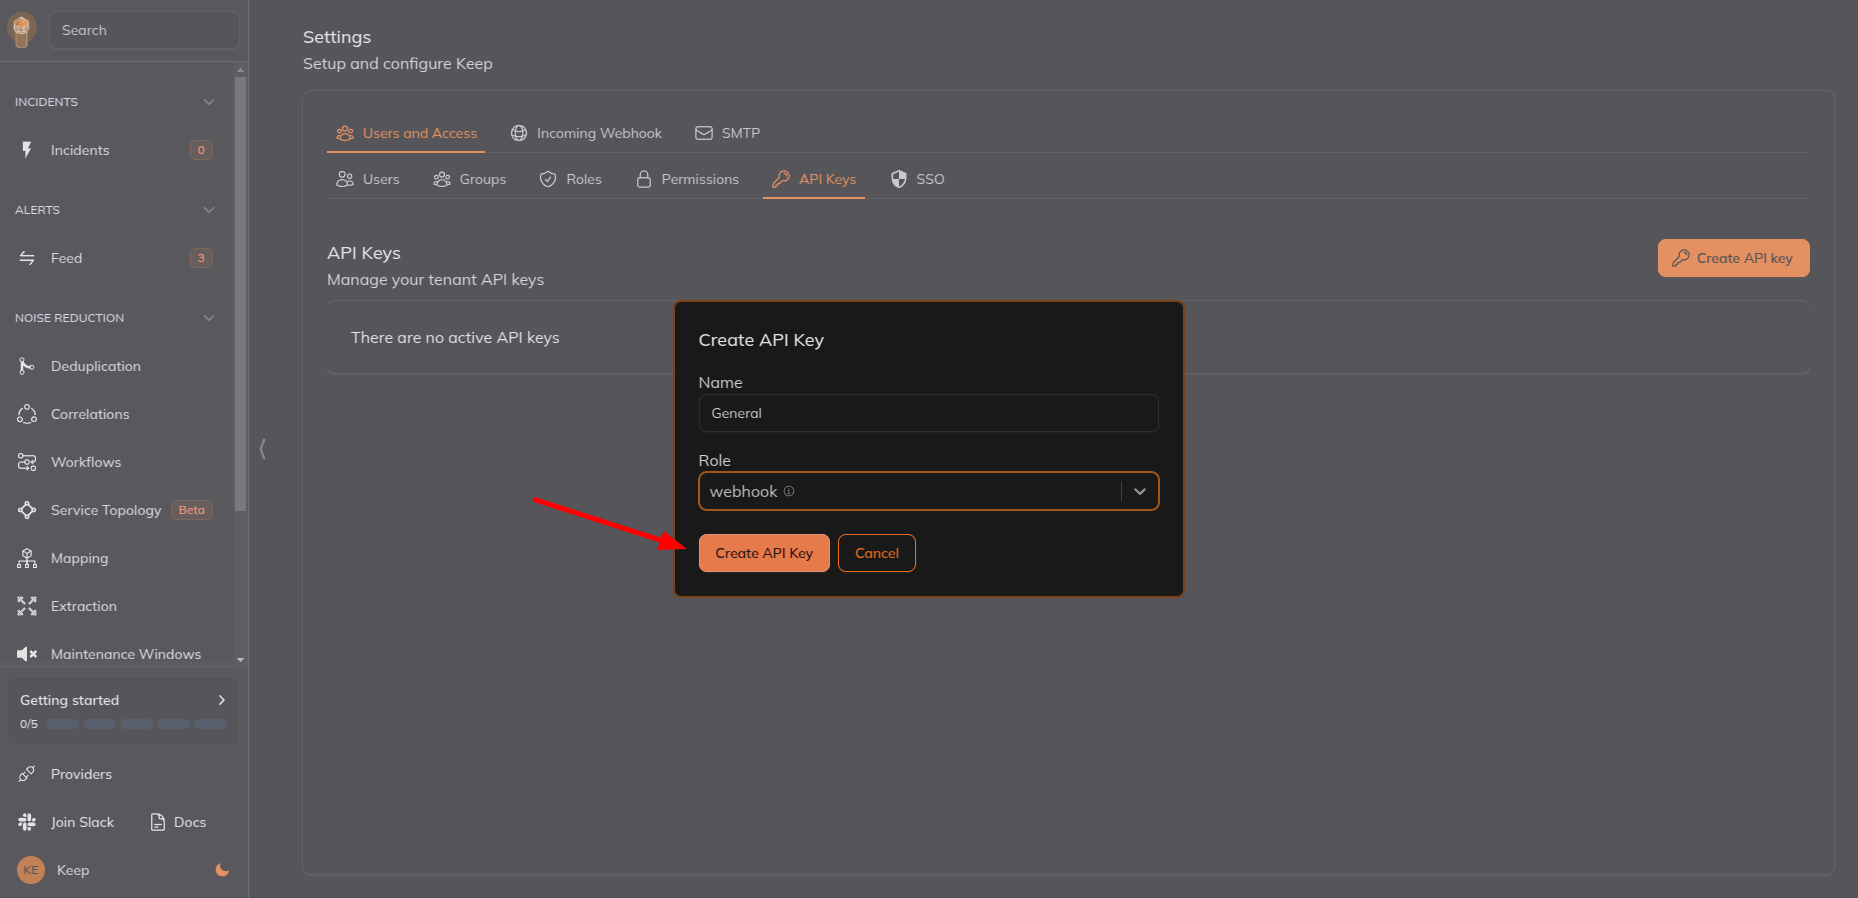
 7. Give name and select the role as `webhook` and click on `Create API Key`.
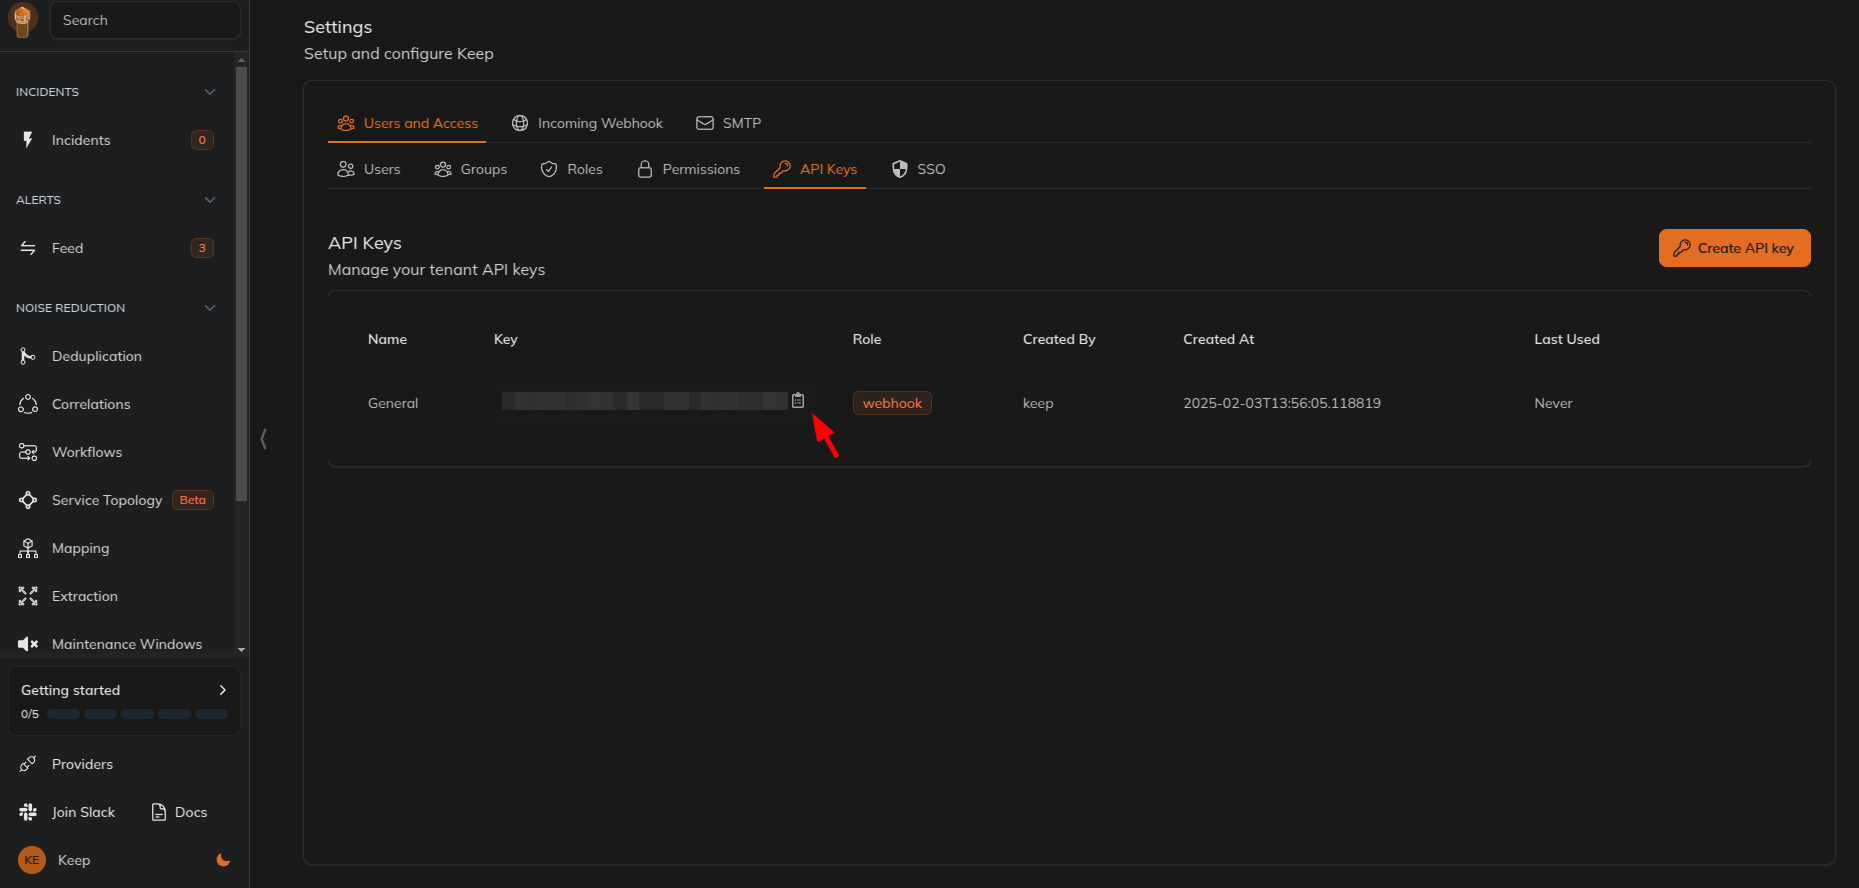
 8. Copy the API key.
 9. Add a new header with key as `X-API-KEY` and create a new API key in Keep and paste it as the value and save the webhook.
 10. Go to `Monitors` tab and click on the `Monitors` in the left sidebar and create a new monitor.
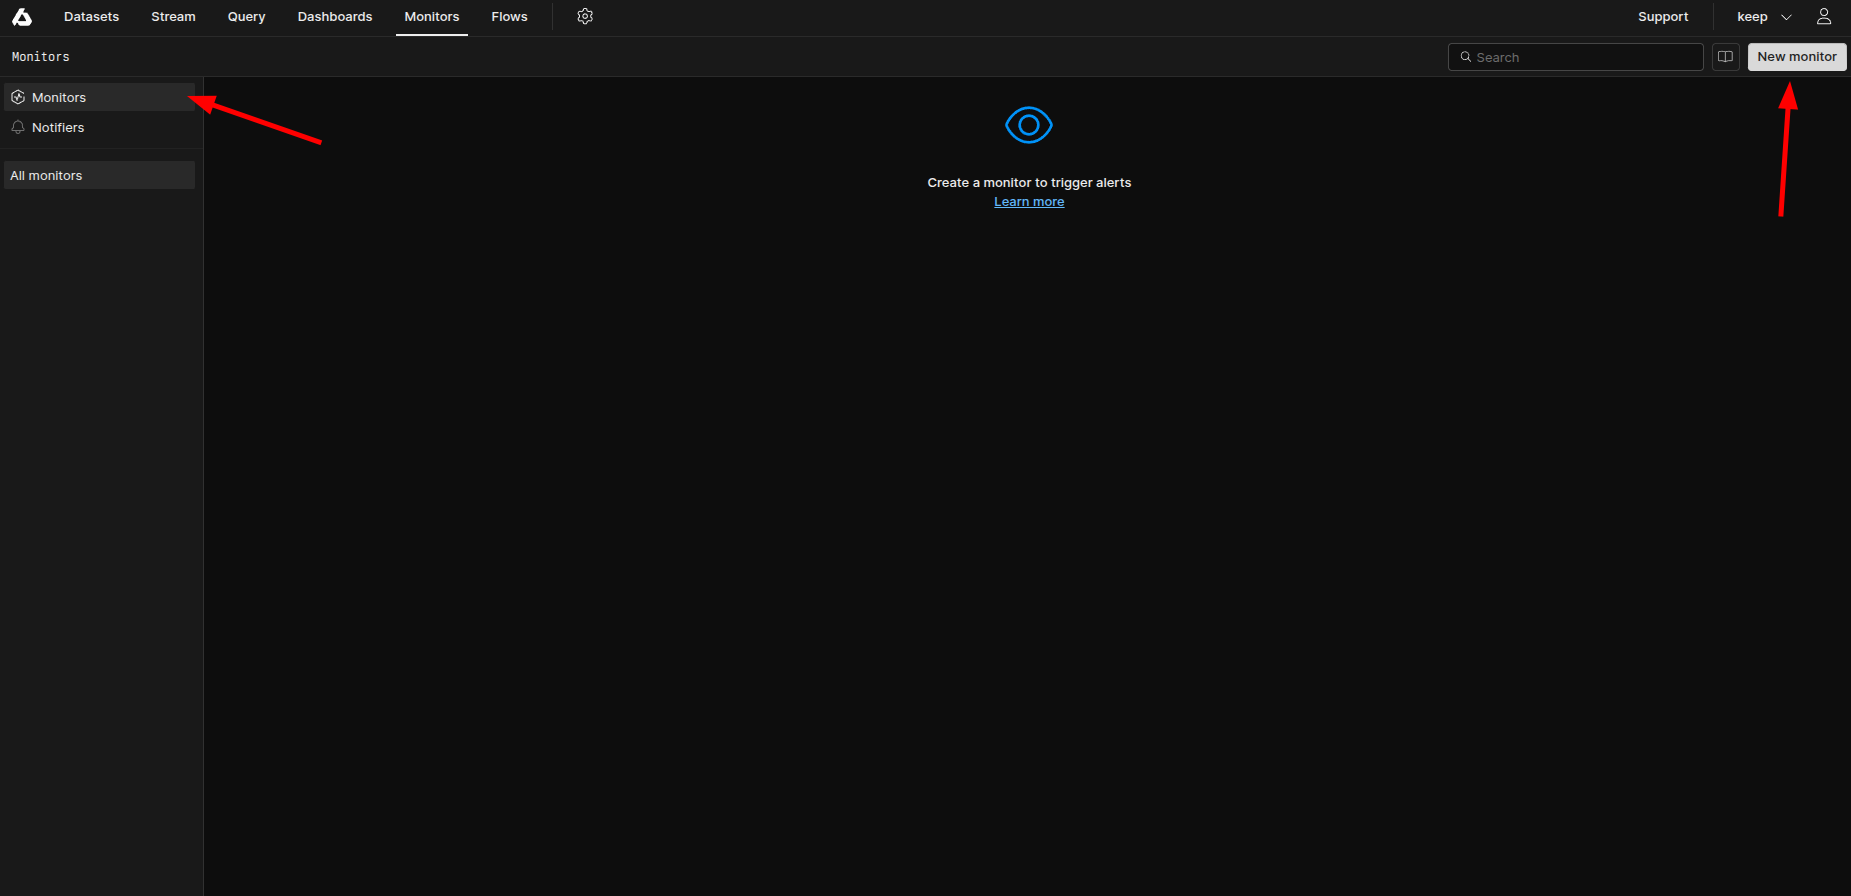 11. Create a new monitor and select the notifier created in the previous step as per your requirement. Refer [Axiom Monitors](https://axiom.co/docs/monitor-data/monitors) to create a new monitor.
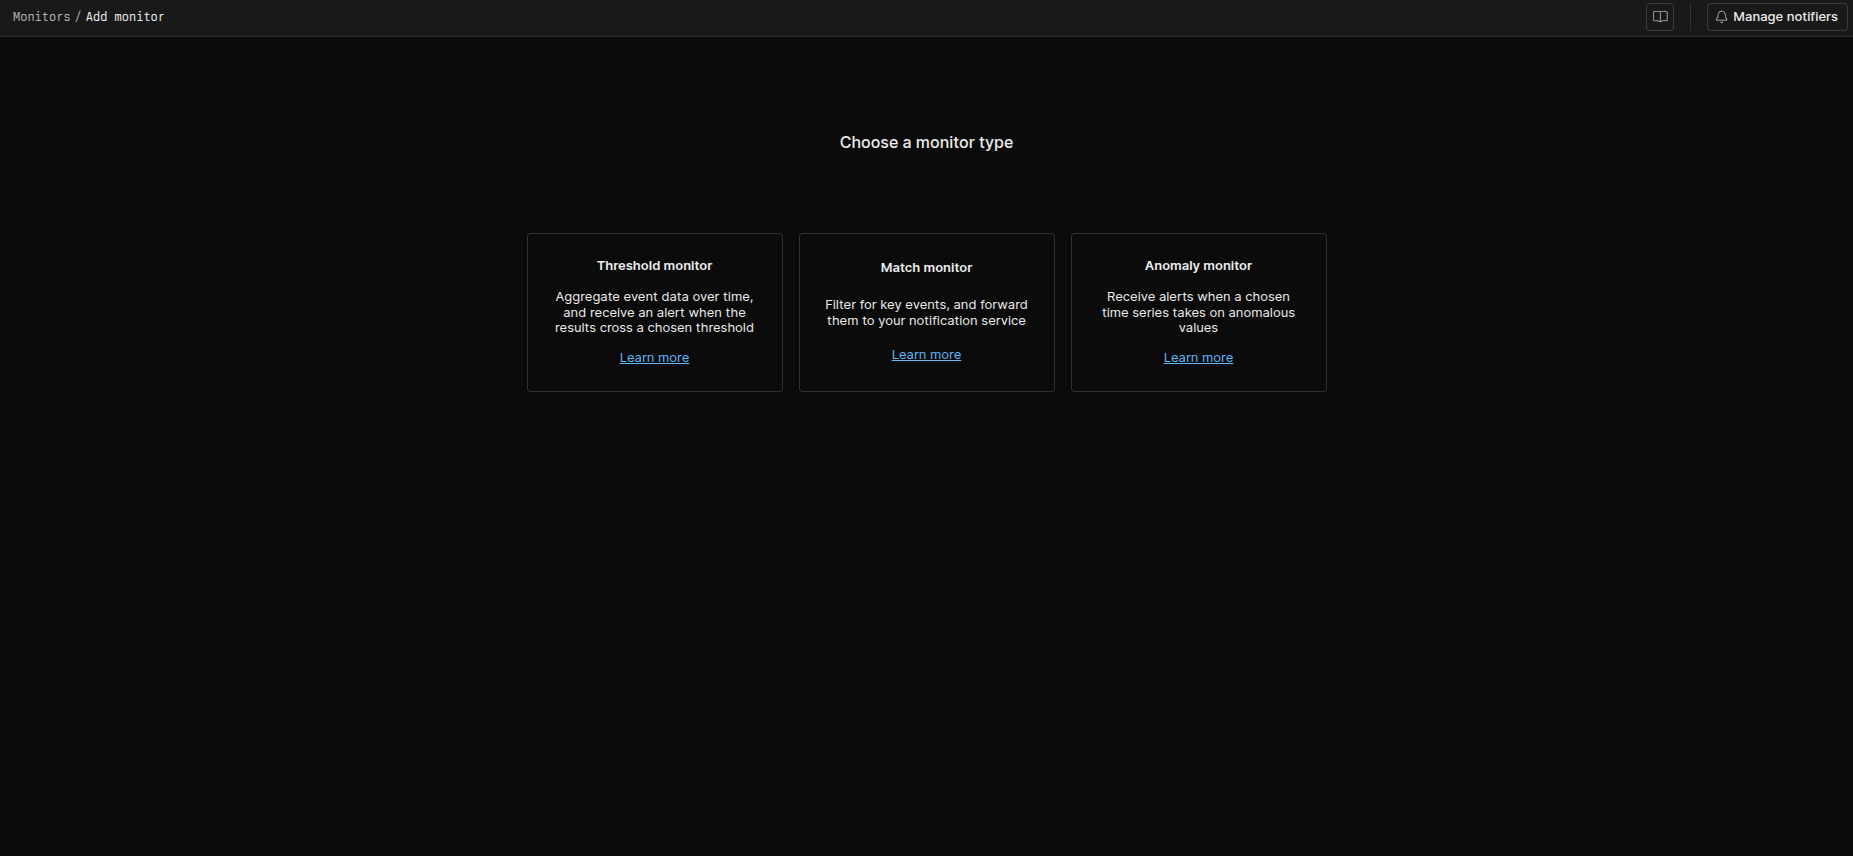
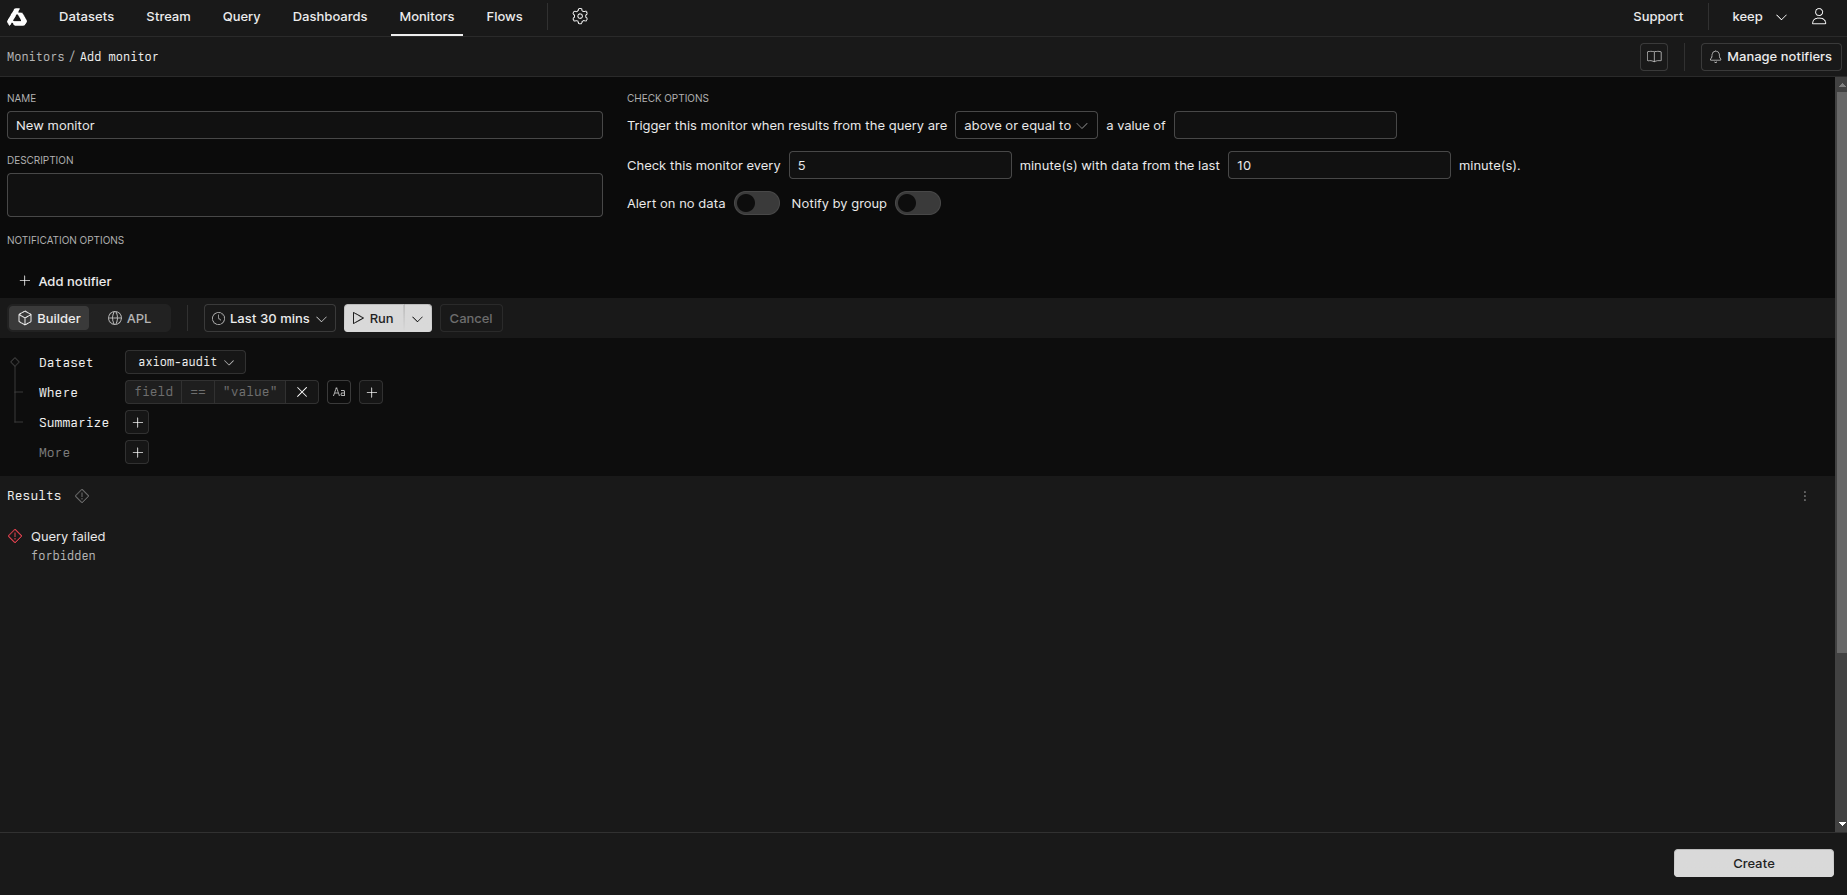 12. Save the monitor. Now, you will receive the alerts in Keep.
## Useful Links
* [Axiom API Documentation](https://axiom.co/docs/restapi/introduction)
12. Save the monitor. Now, you will receive the alerts in Keep.
## Useful Links
* [Axiom API Documentation](https://axiom.co/docs/restapi/introduction)