Authentication
This provider requires authentication.
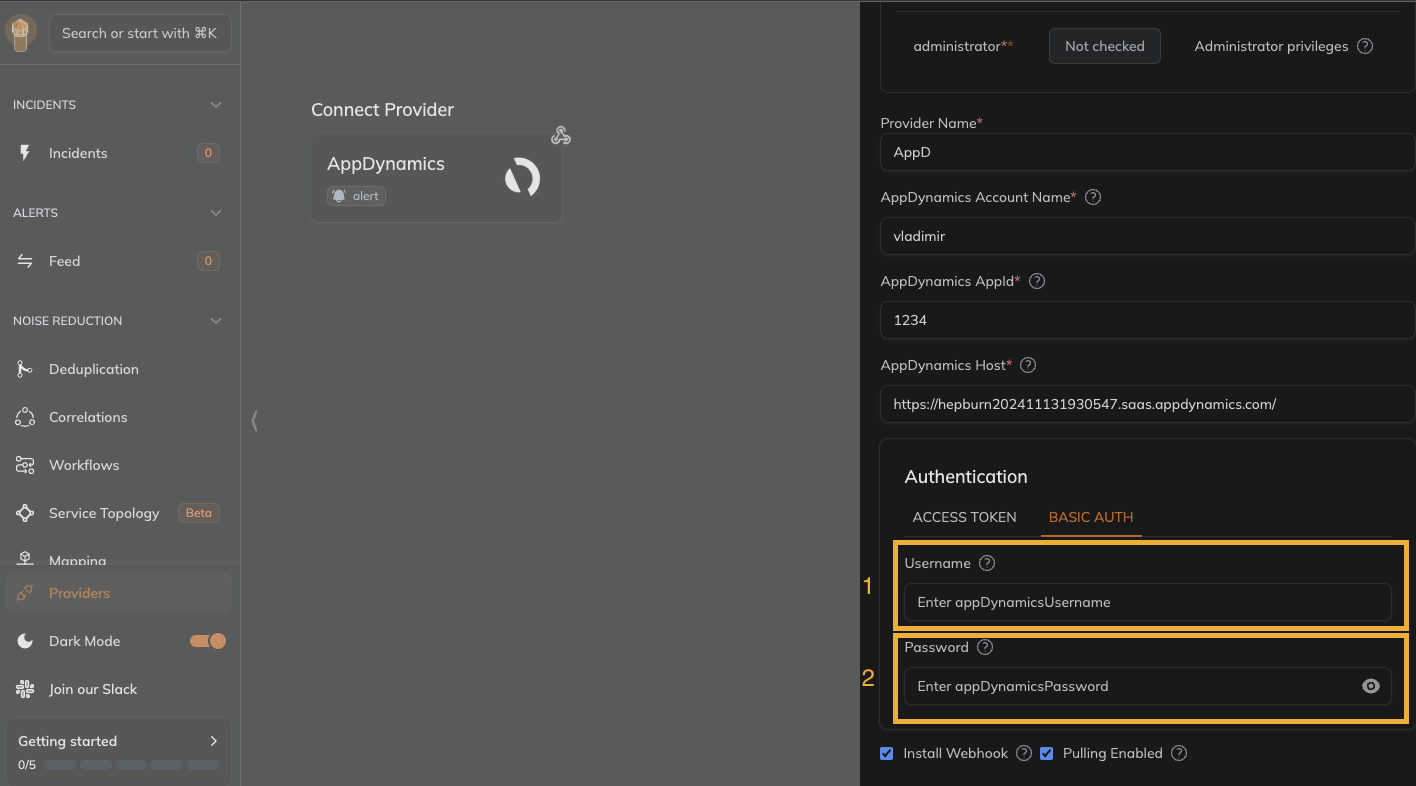
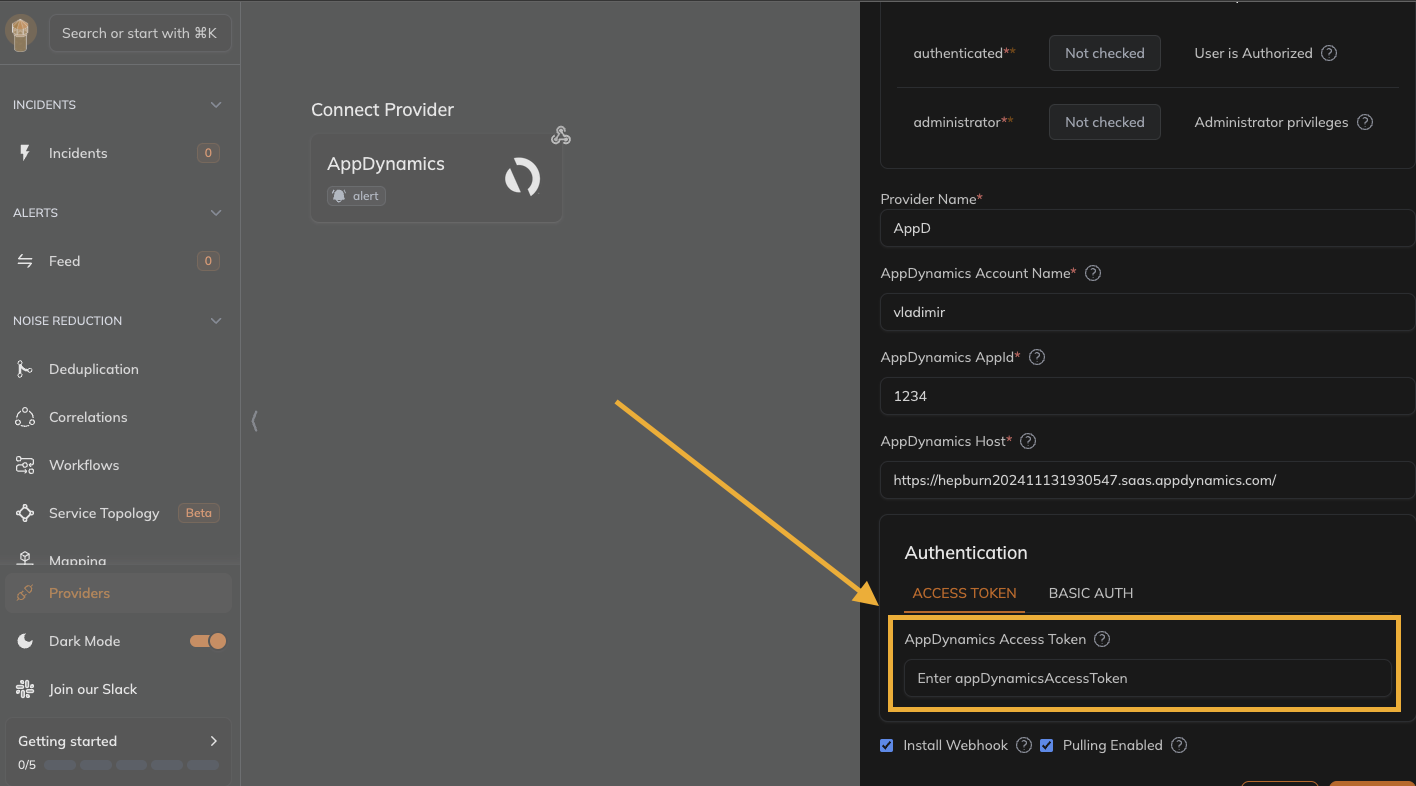
- appDynamicsAccountName: AppDynamics Account Name (required: True, sensitive: False)
- appId: AppDynamics appId (required: True, sensitive: False)
- host: AppDynamics host (required: True, sensitive: False)
- appDynamicsAccessToken: AppDynamics Access Token (required: False, sensitive: False)
- appDynamicsUsername: Username (required: False, sensitive: False)
- appDynamicsPassword: Password (required: False, sensitive: True)
Certain scopes may be required to perform specific actions or queries via the provider. Below is a summary of relevant scopes and their use cases:
- authenticated: User is Authorized (mandatory)
- administrator: Administrator privileges (mandatory)
In workflows
This provider can’t be used as a “step” or “action” in workflows. If you want to use it, please let us know by creating an issue in the GitHub repository.
Connecting with the Provider
- Ensure you have a AppDynamics account with the necessary permissions. The basic permissions required are
Account Owner or Administrator. Alternatively you can create an account instructions
Provider configuration
- Find your account name here.
- Get the appId of the Appdynamics instance in which you wish to install the webhook into.
- Determine the Host here.
Basic Auth authentication
- Obtain AppDynamics Username and Password
- Go to Basic Auth tab under Authentication section
- Enter Username and Password
Access Token authentication
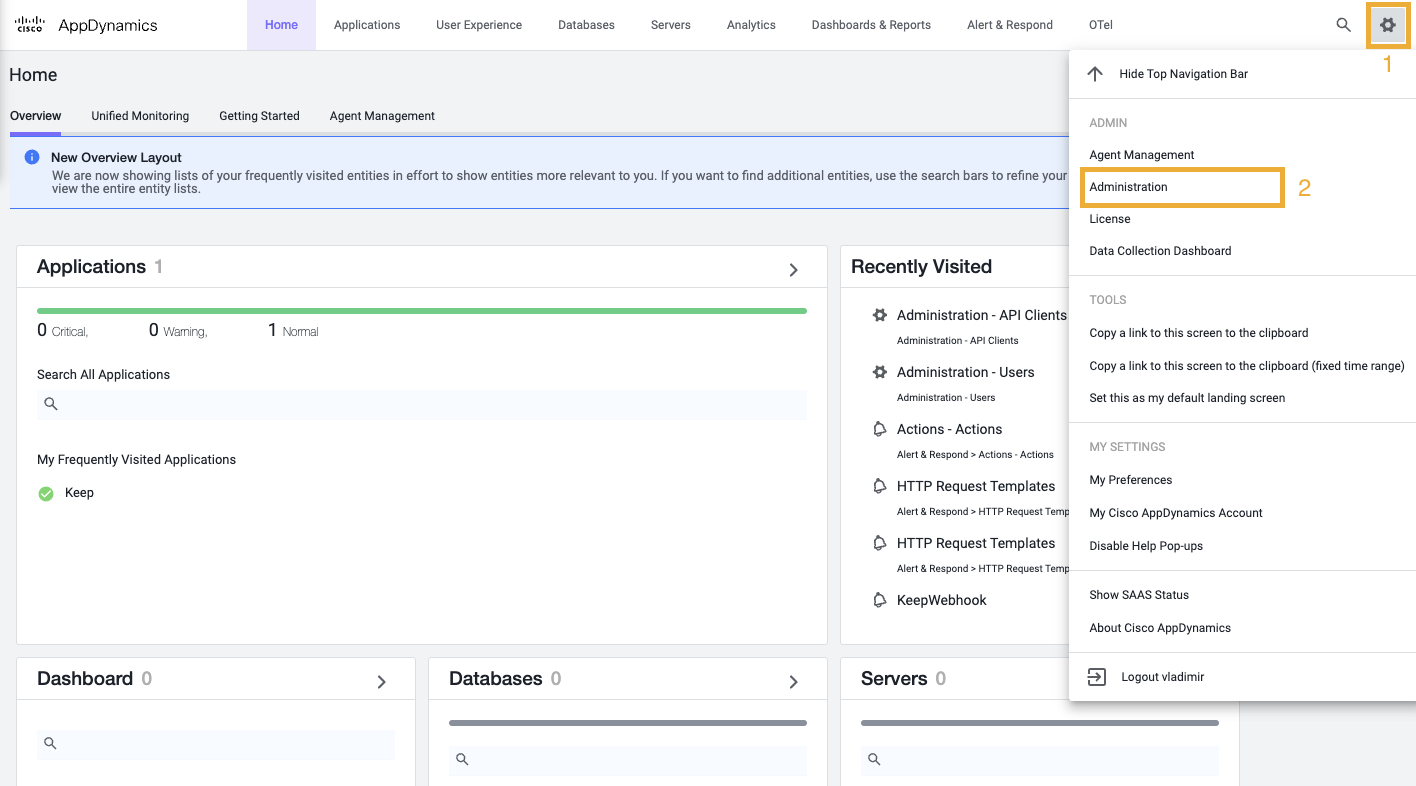
- Log in to the Controller UI as an Account Owner or other roles with the Administer users, groups, roles permission.
- Go to Administration
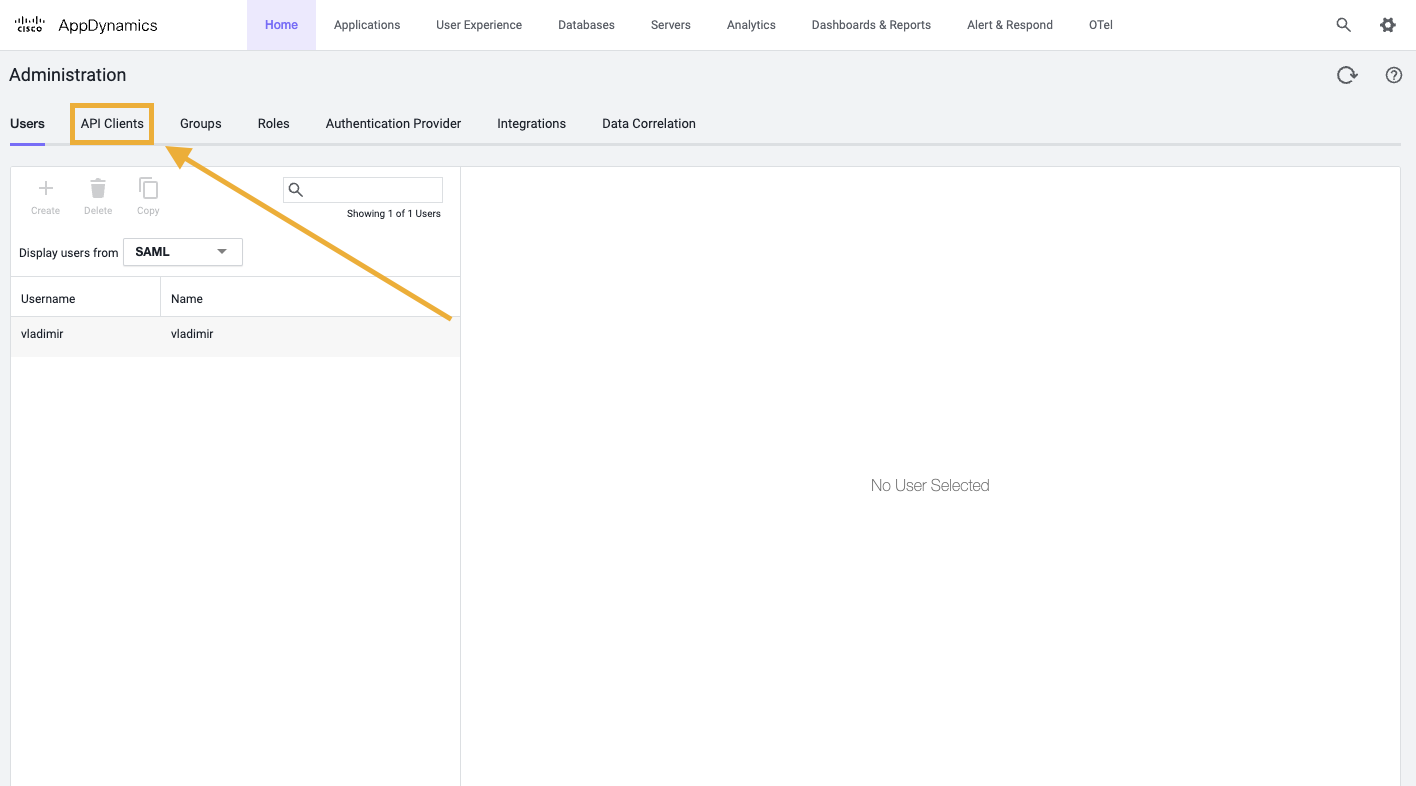
- Go to API Client tab
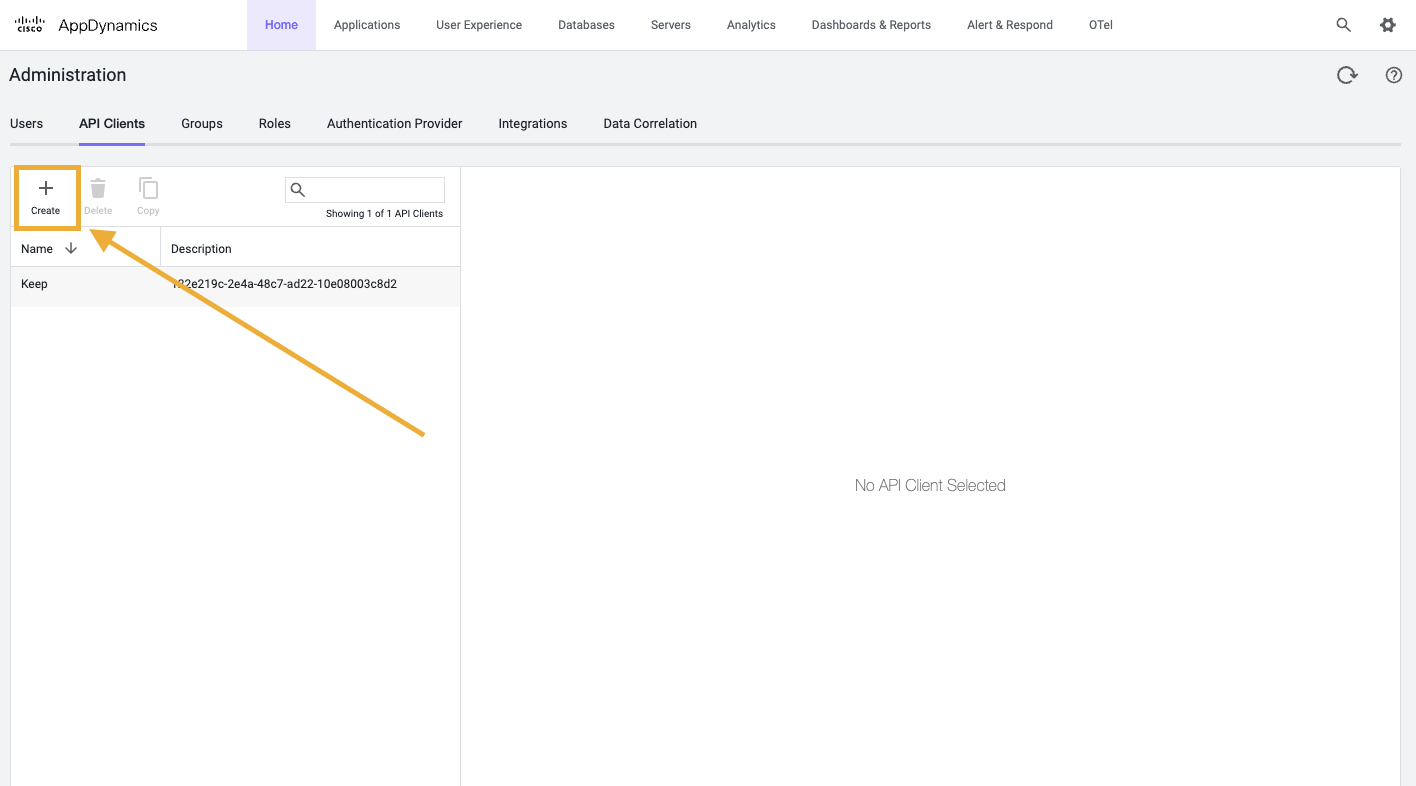
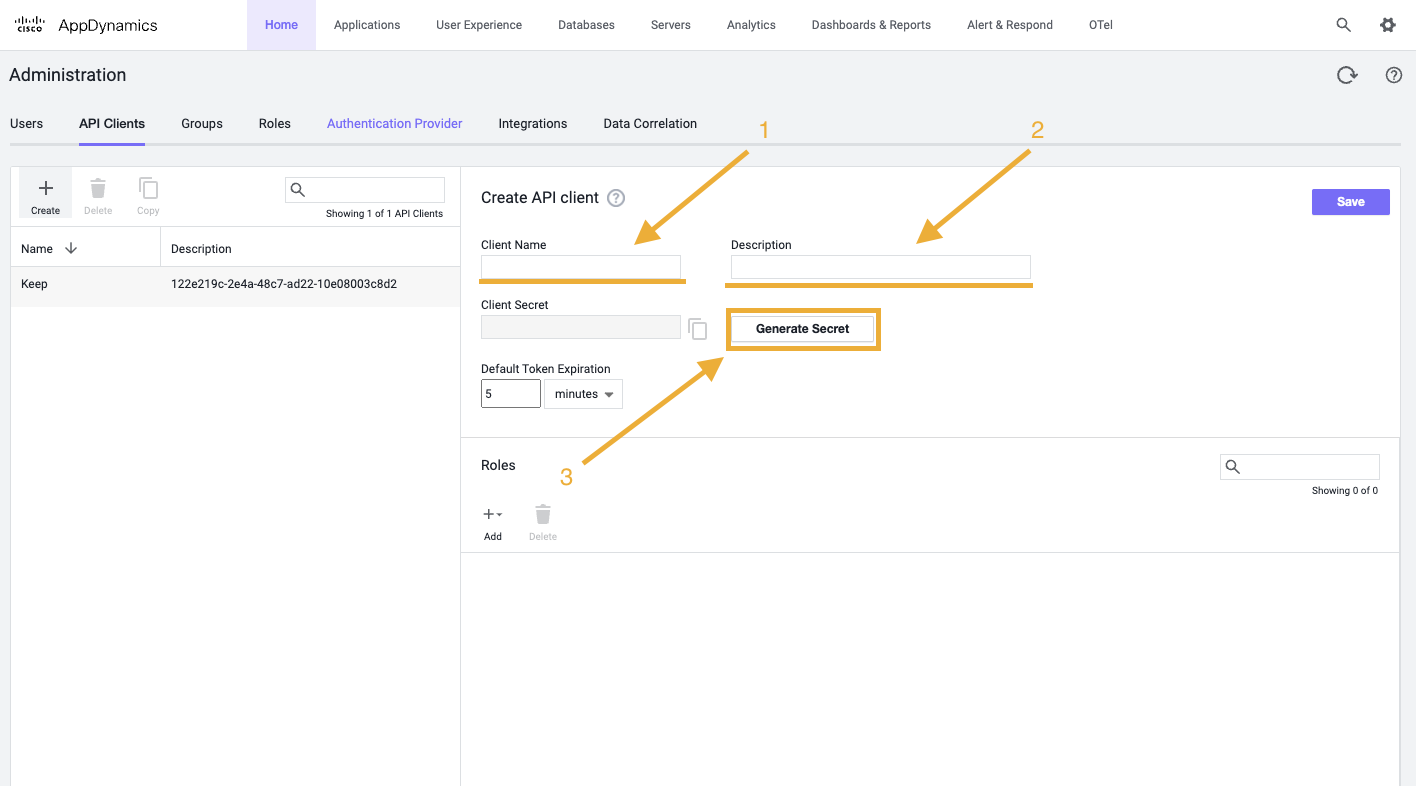
- Click + Create
- Fill Client Name and Description
- Click Generate Secret
This API Client secret is not an authentication token yet
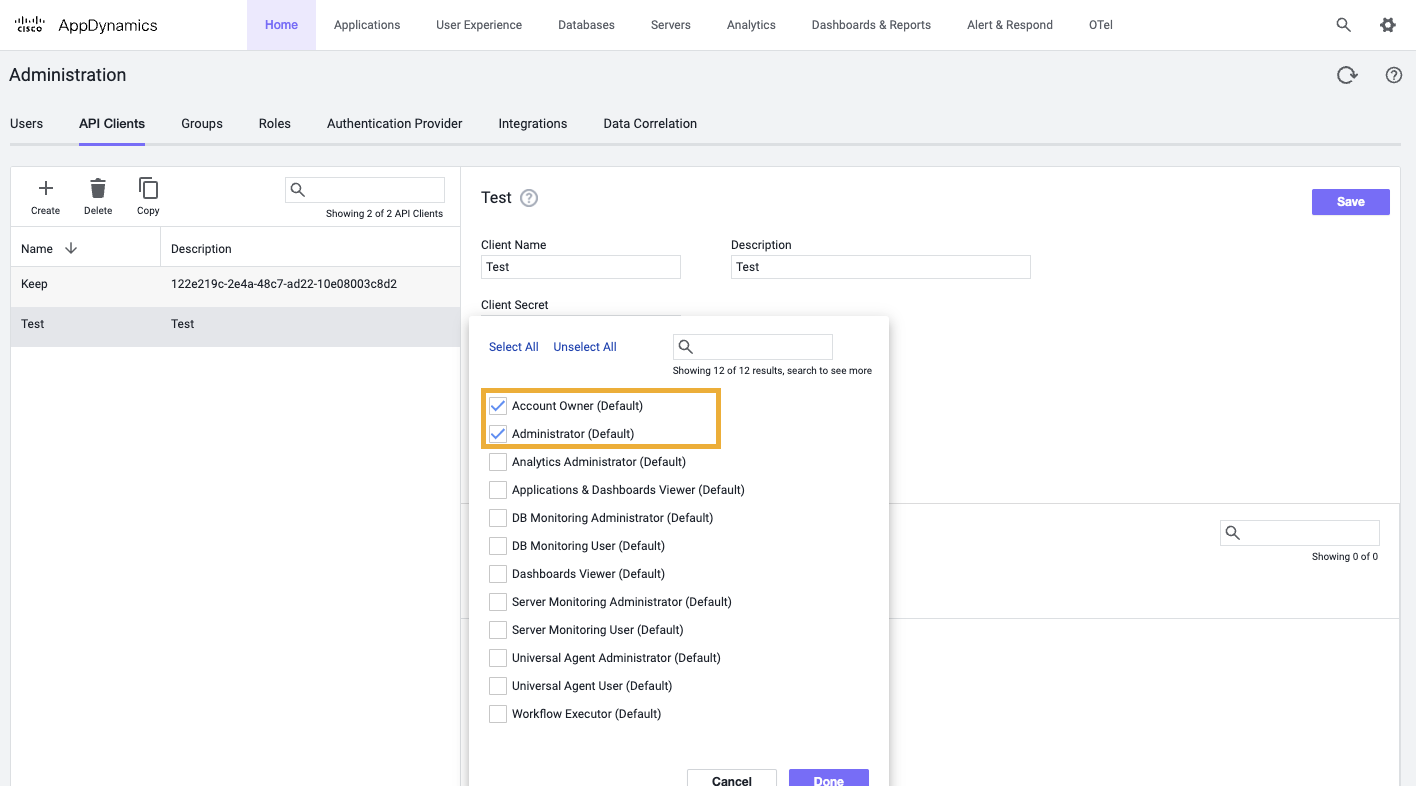
- Add Account Owner and/or Administrator roles
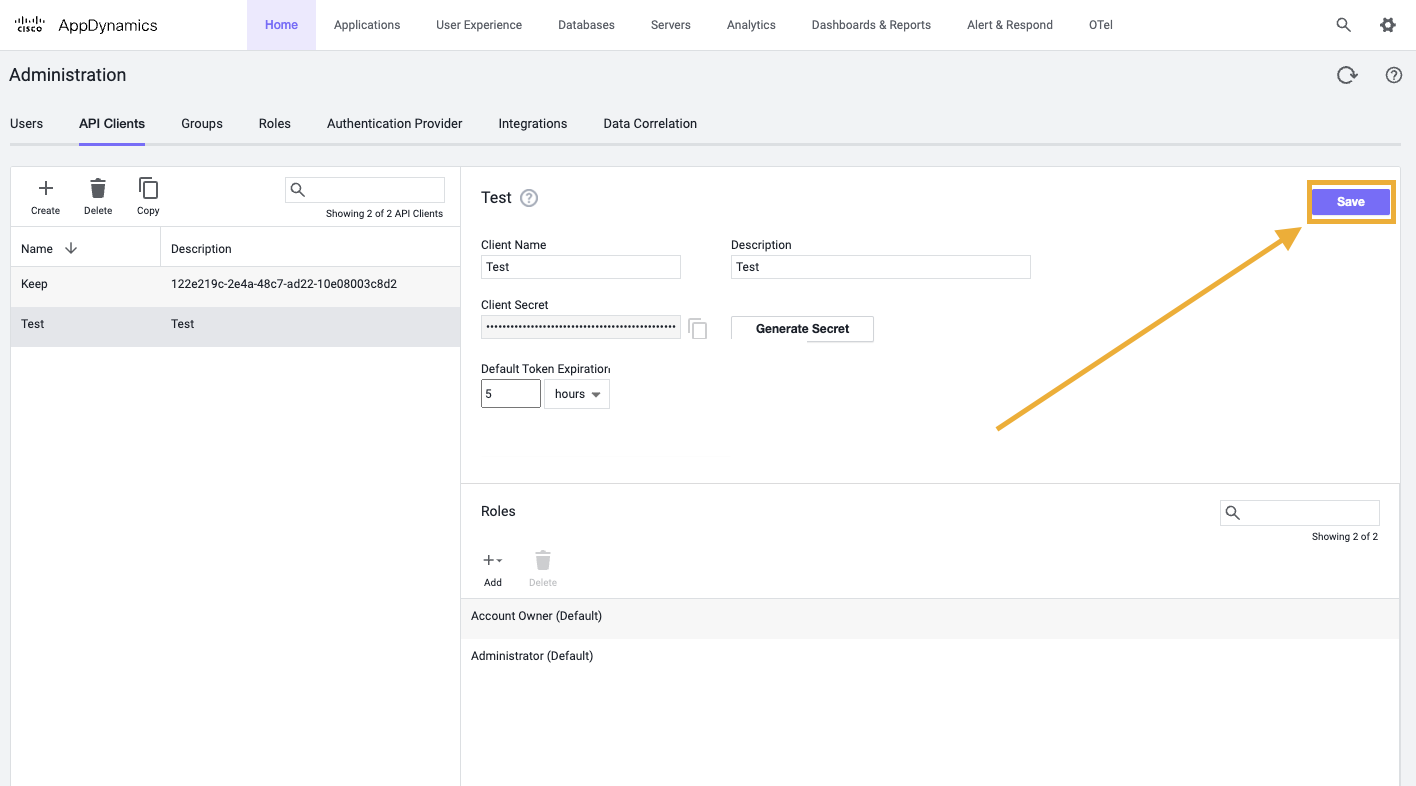
- Click Save
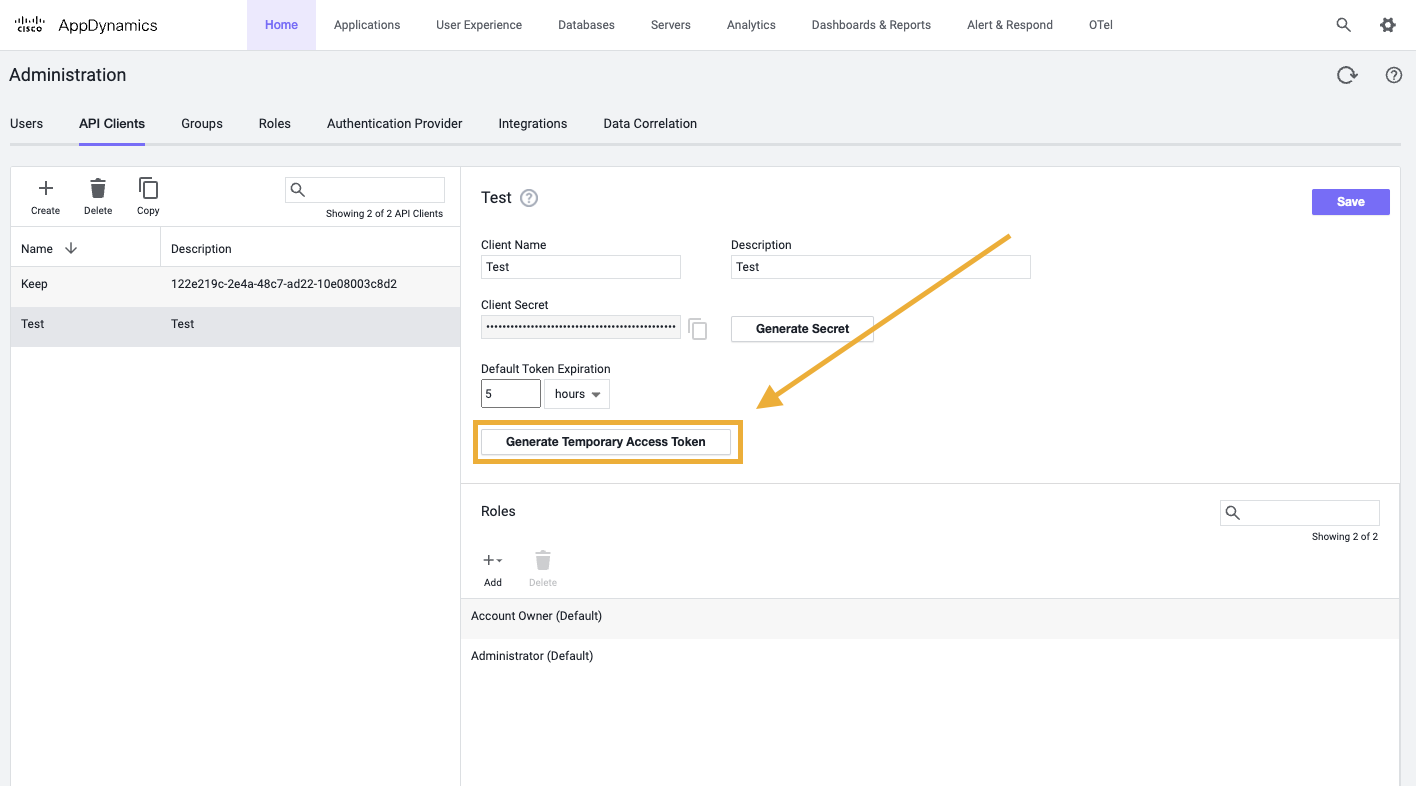
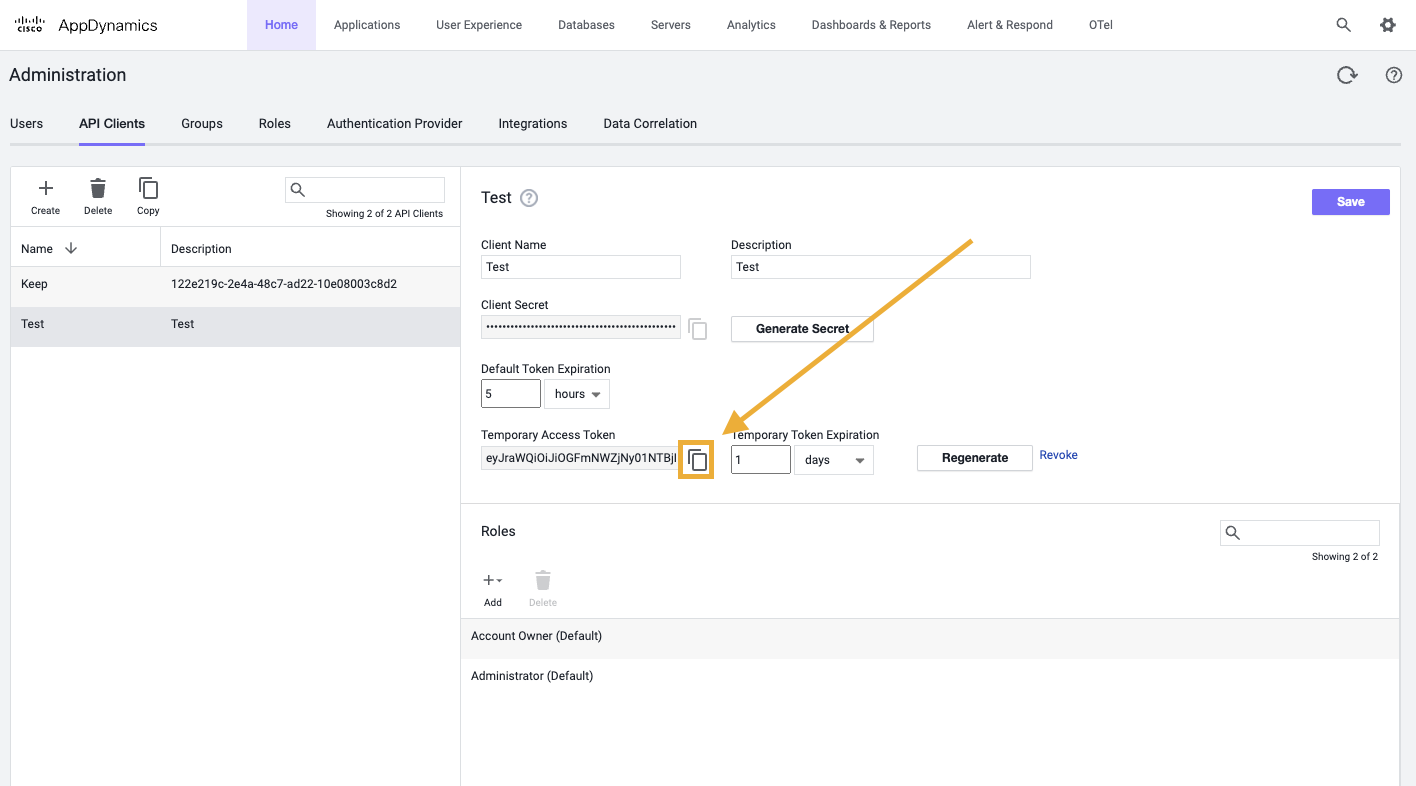
- Click Generate Temporary Token
This token is not persistent, but since Keep uses it just once to install Webhook, we will use it without oAuth
- Click Save one again
This is important. Otherwise generated token will not be saved and authentication will fail
- Copy generated token
- Go to Access Token tab under Authentication section
- Enter Access Token
Connecting provider
- Ensure Install webhook is checked
- Click Connect
Webhook Integration Modifications
The webhook integration adds Keep as an alert monitor within the AppDynamics instance. It can be found under the “Alerts & Respond” section.
The integration automatically gains access to the following scopes within AppDynamics:
administratorauthenticated
Useful Links