Authentication
This provider requires authentication.- checklyApiKey: Checkly API Key (required: True, sensitive: True)
- accountId: Checkly Account ID (required: True, sensitive: True)
- read_alerts: Read alerts from Checkly
In workflows
This provider can’t be used as a “step” or “action” in workflows. If you want to use it, please let us know by creating an issue in the GitHub repository.Connecting Checkly to Keep
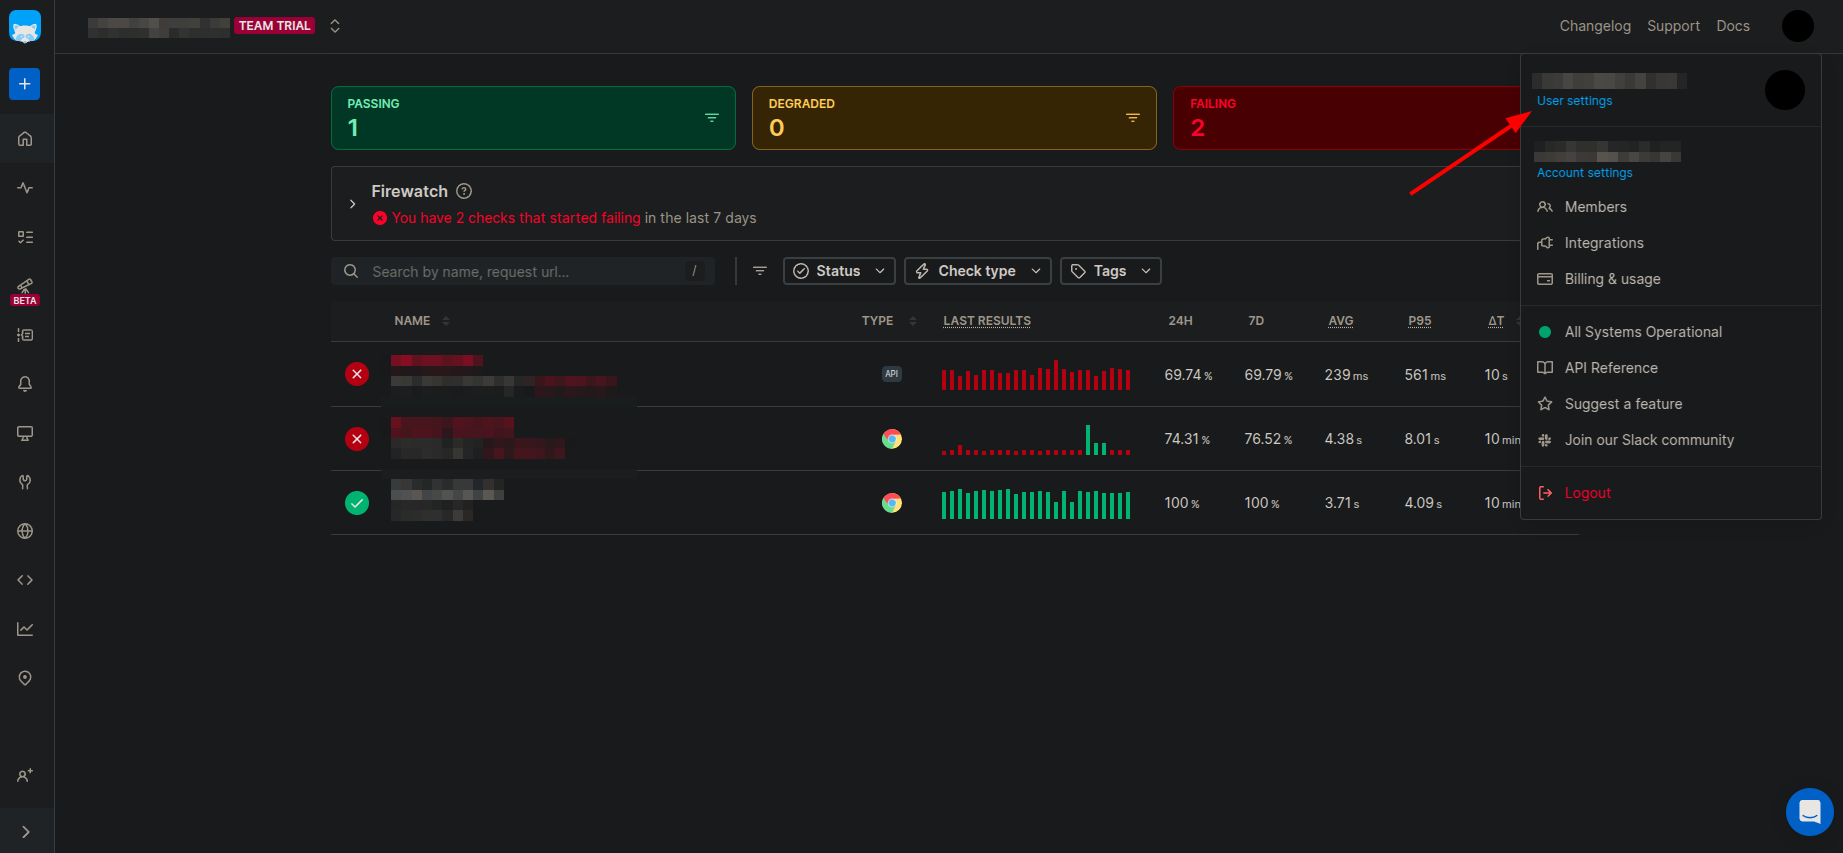
- Open Checkly dashboard and click on your profile picture in the top right corner.
-
Click on
User Settings.
- Open the
API Keystab and click onCreate API Keyto generate a new API key.
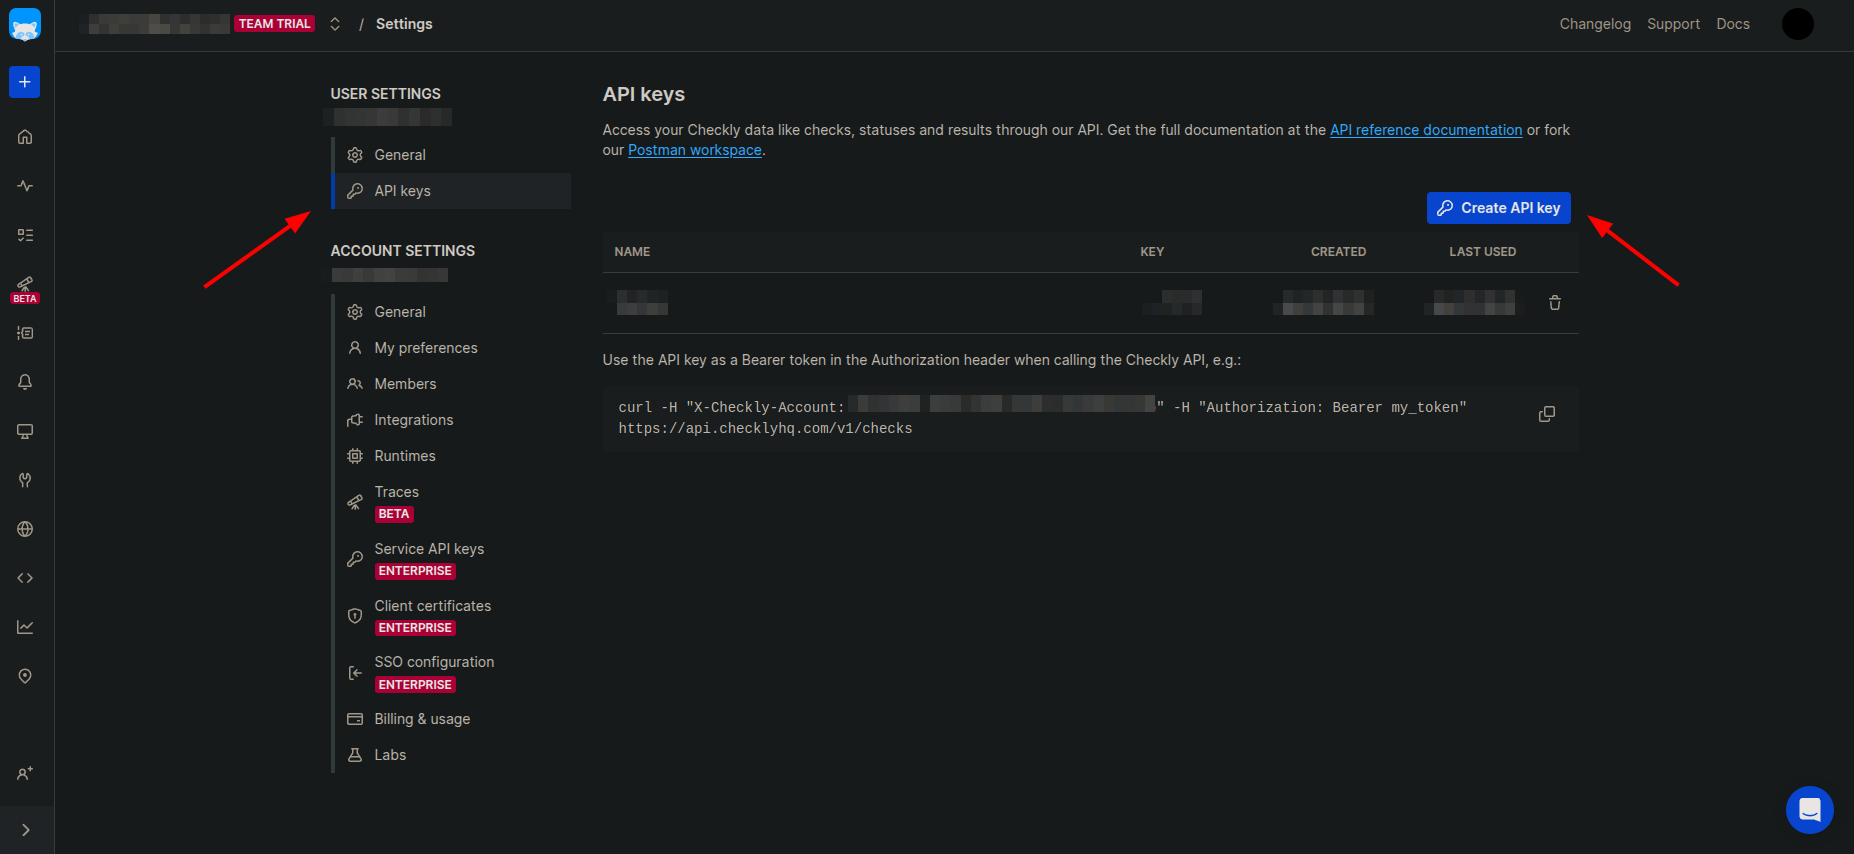
- Copy the API key.
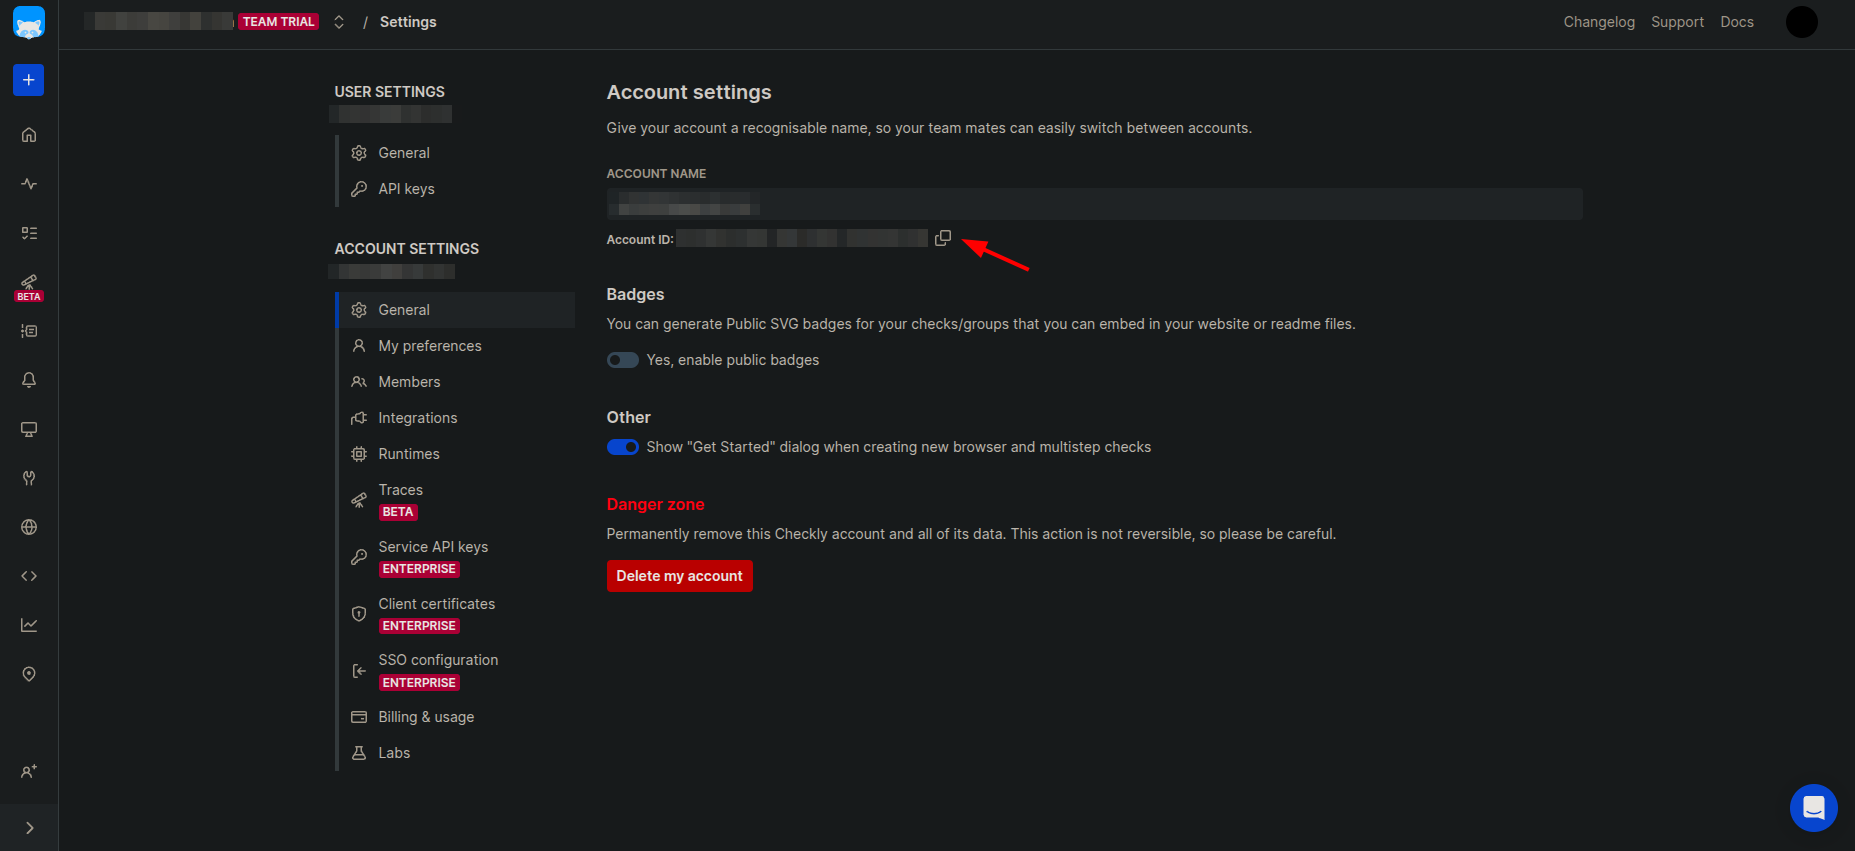
-
Open
Generaltab under Account Settings and copy theAccount ID.
- Go to Keep, add Checkly as a provider and enter the API key and Account ID in the respective fields and click on
Connect.
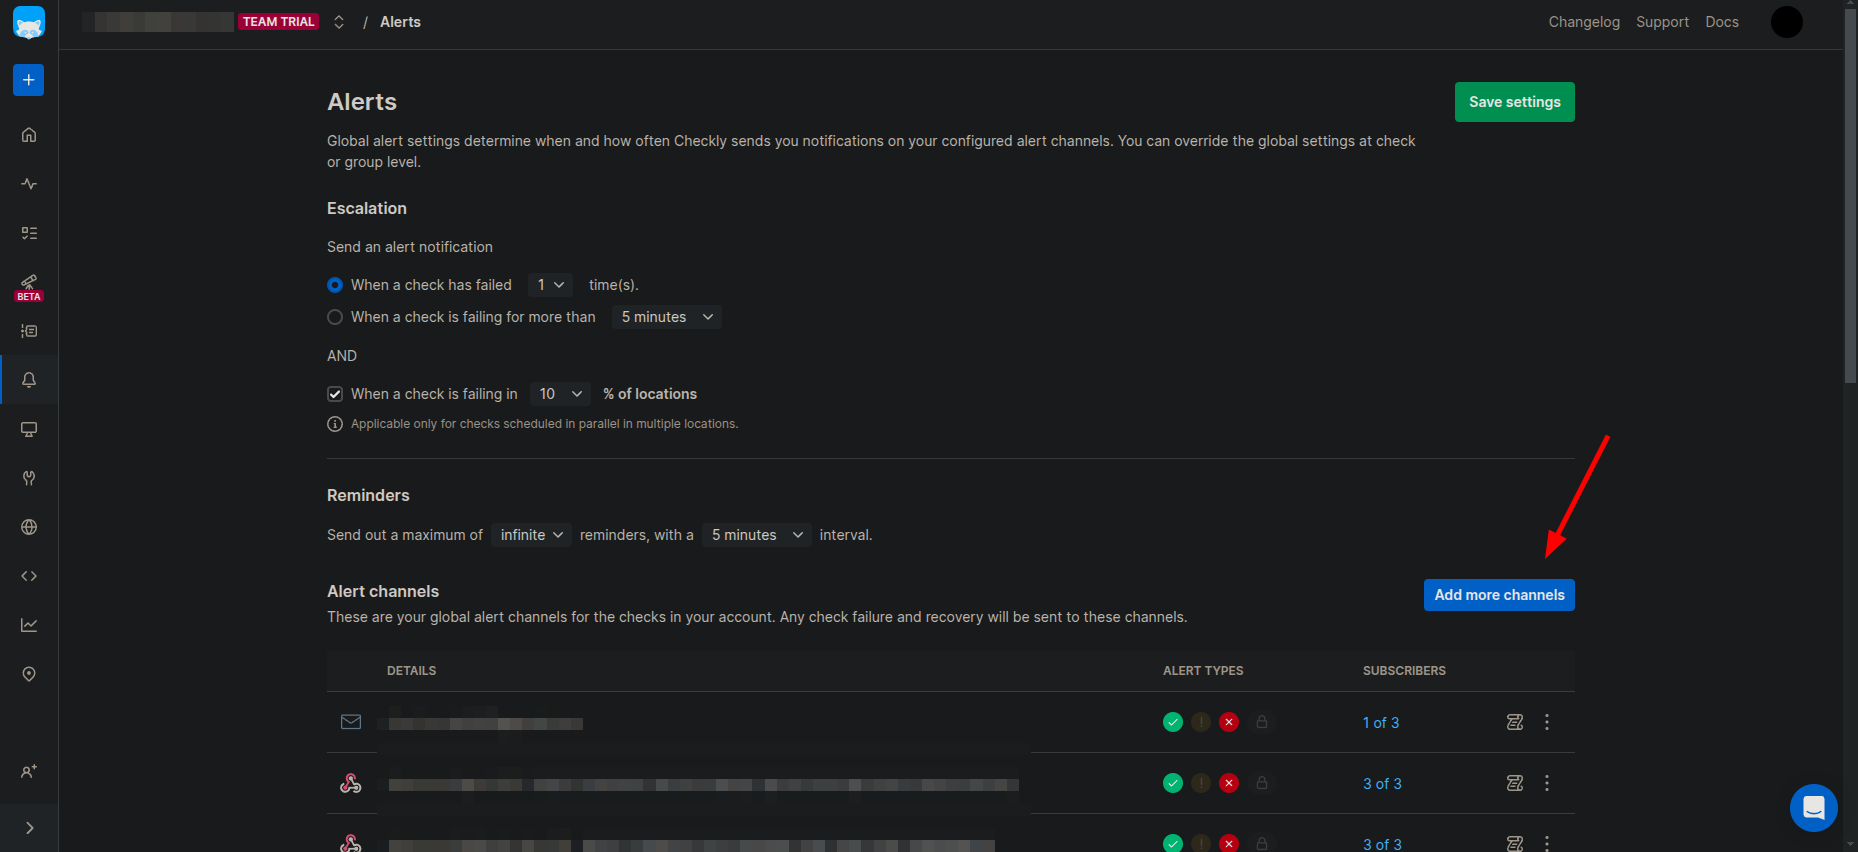
Webhooks Integration
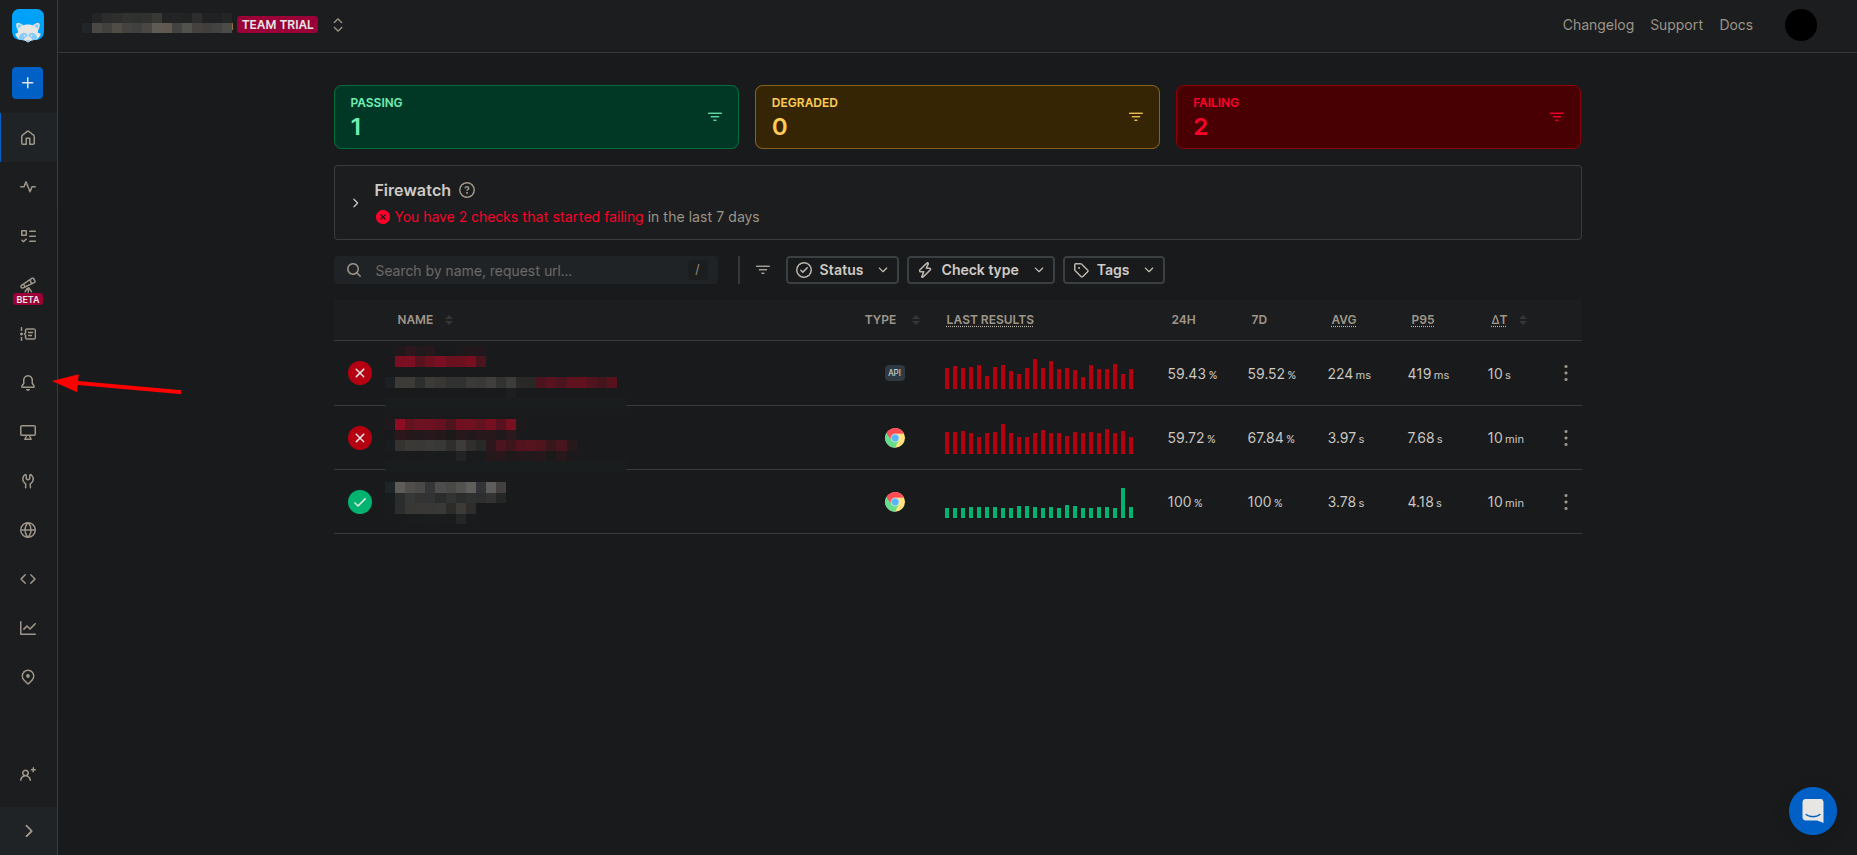
- Open Checkly dashboard and open
Alertstab in the left sidebar.
- Click on
Add more channels
- Select
Webhookfrom the list of available channels.
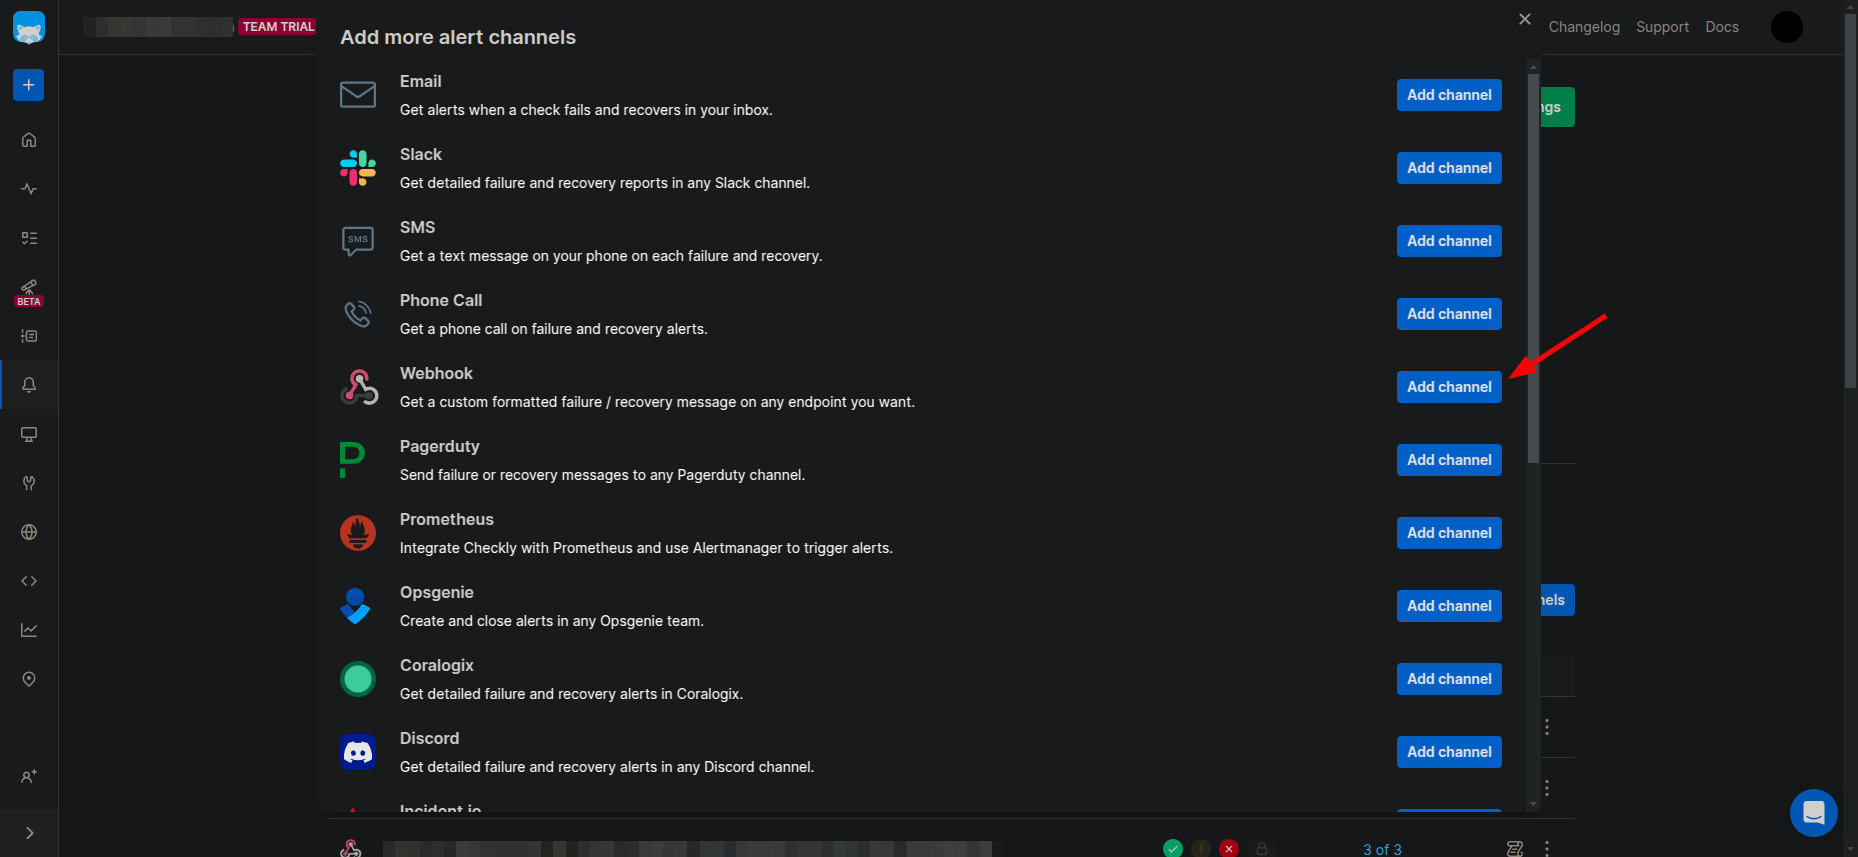
-
Enter a name for the webhook, select the method as
POST - Enter https://api.keephq.dev/alerts/event/checkly as the URL.
-
Copy the below snippet and paste in the
Bodyof Webhook. Refer the screenshot below for reference.

- Go to Headers tab and add a new header with key as
X-API-KEYand create a new API key in Keep and paste it as the value and save the webhook.

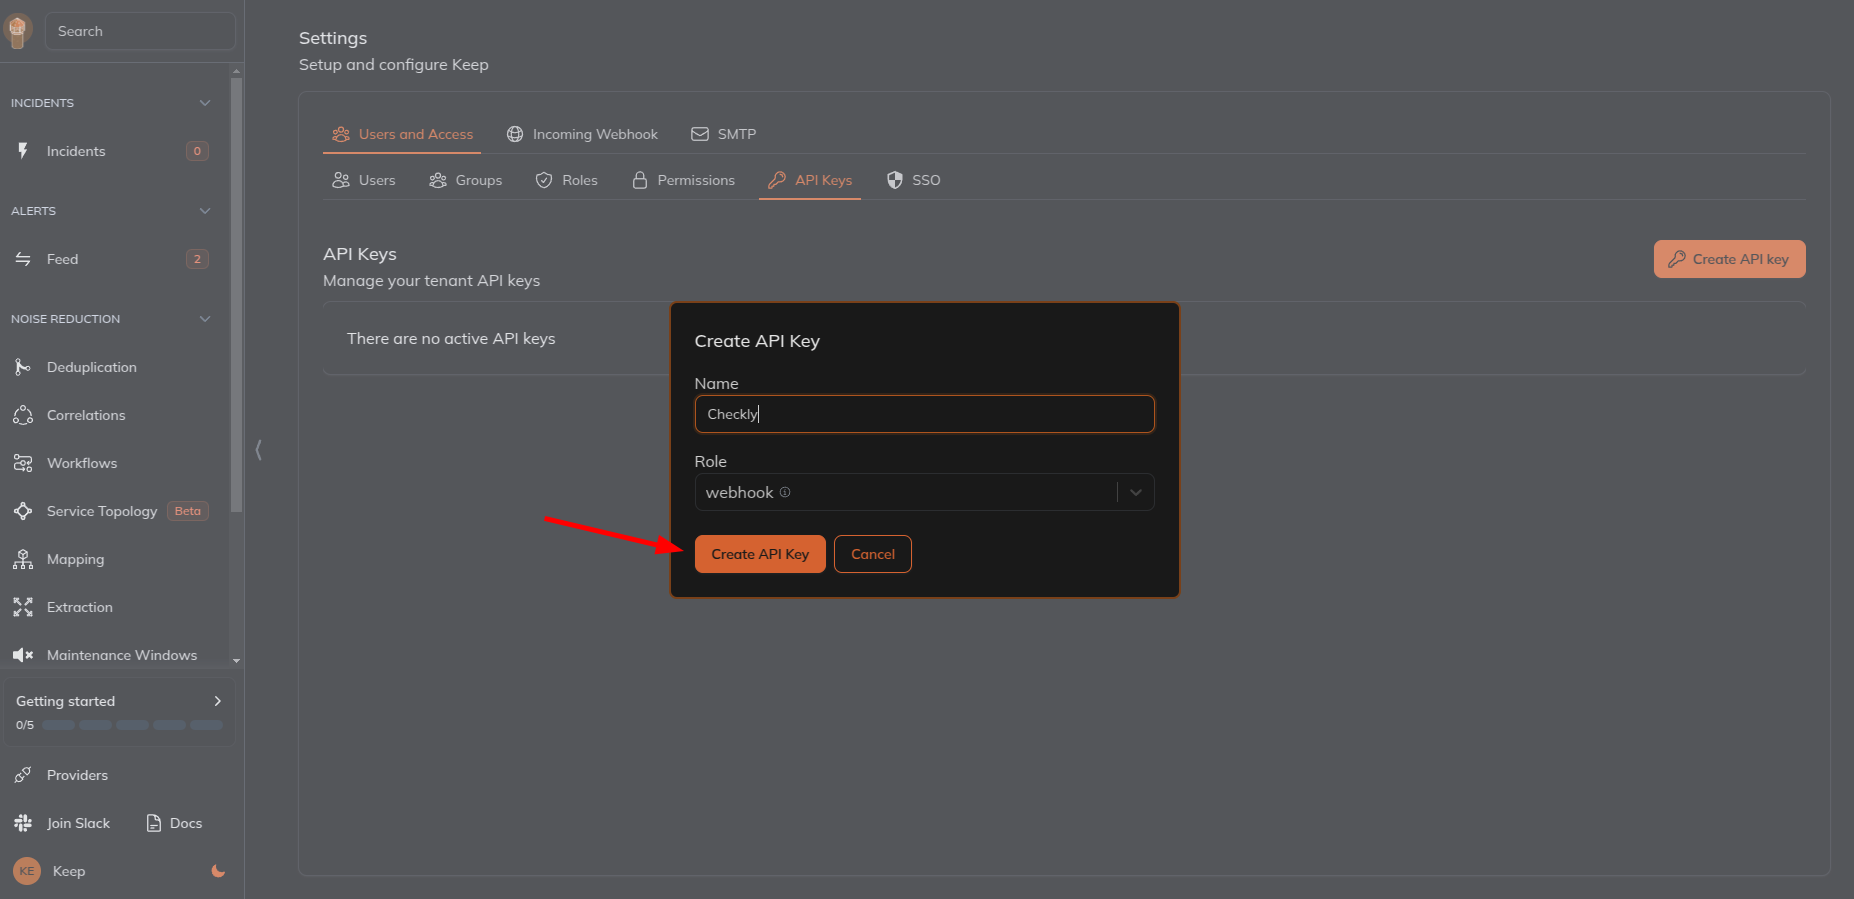
- Follow the below steps to create a new API key in Keep.
-
Go to Keep dashboard and click on the profile icon in the botton left corner and click
Settings.
- Select
Users and Accesstab and then selectAPI Keystab and create a new API key.
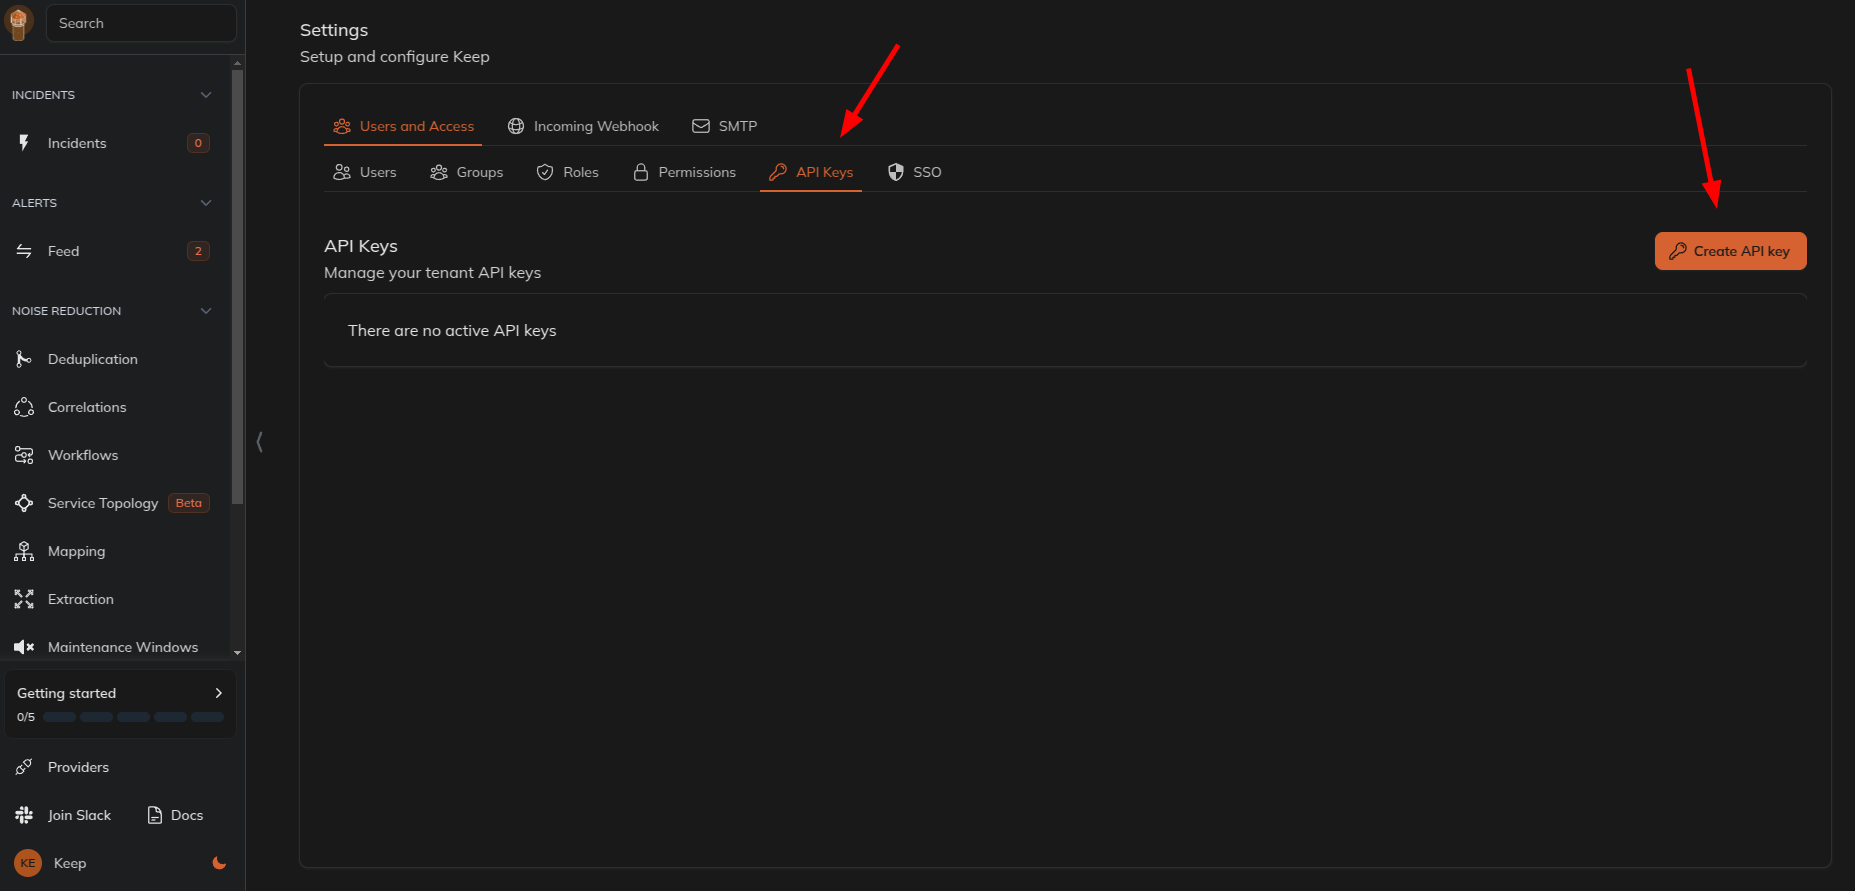
- Give name and select the role as
webhookand click onCreate API Key.
- Use the generated API key in the
X-API-KEYheader of the webhook created in Checkly.