Authentication
This provider requires authentication.- zabbix_frontend_url: Zabbix Frontend URL (required: True, sensitive: False)
- auth_token: Zabbix Auth Token (required: True, sensitive: True)
- verify: Verify SSL certificates (required: False, sensitive: False)
- action.create: This method allows to create new actions. (mandatory) (Documentation)
- action.get: This method allows to retrieve actions. (mandatory) (Documentation)
- event.acknowledge: This method allows to update events. (mandatory) (Documentation)
- mediatype.create: This method allows to create new media types. (mandatory) (Documentation)
- mediatype.get: This method allows to retrieve media types. (mandatory) (Documentation)
- mediatype.update: This method allows to update media types. (mandatory) (Documentation)
- problem.get: The method allows to retrieve problems. (mandatory) (Documentation)
- script.create: This method allows to create new scripts. (mandatory) (Documentation)
- script.get: The method allows to retrieve scripts. (mandatory) (Documentation)
- script.update: This method allows to update scripts. (mandatory) (Documentation)
- user.get: This method allows to retrieve users. (mandatory) (Documentation)
- user.update: This method allows to update users. (mandatory) (Documentation)
In workflows
This provider can’t be used as a “step” or “action” in workflows. If you want to use it, please let us know by creating an issue in the GitHub repository.Provider Methods
The provider exposes the following Provider Methods. They are available in the AI Assistant.-
close_problem No description. (action, scopes: event.acknowledge)
id: The problem id.
-
change_severity No description. (action, scopes: event.acknowledge)
id: The problem id.new_severity: The new severity. Can be an integer string (0-5) or severity name:
- “0” or “Not classified”
- “1” or “Information”
- “2” or “Warning”
- “3” or “Average”
- “4” or “High”
- “5” or “Disaster”
-
surrpress_problem No description. (action, scopes: event.acknowledge)
id: The problem id.suppress_until: The datetime to suppress the problem until.
-
unsurrpress_problem No description. (action, scopes: event.acknowledge)
id: The problem id.
-
acknowledge_problem No description. (action, scopes: event.acknowledge)
id: The problem id.
-
unacknowledge_problem No description. (action, scopes: event.acknowledge)
id: The problem id.
-
add_message_to_problem No description. (action, scopes: event.acknowledge)
id: The problem id.message_text: The message text.
-
get_problem_messages No description. (view, scopes: problem.get)
id: The problem id.
Connecting with the Provider
API Key
To obtain Zabbix authentication token, follow the following steps, divided in to 3 categories (Docs): First, login in to your Zabbix account (the providedzabbix_frontend_url) with a privileged user.
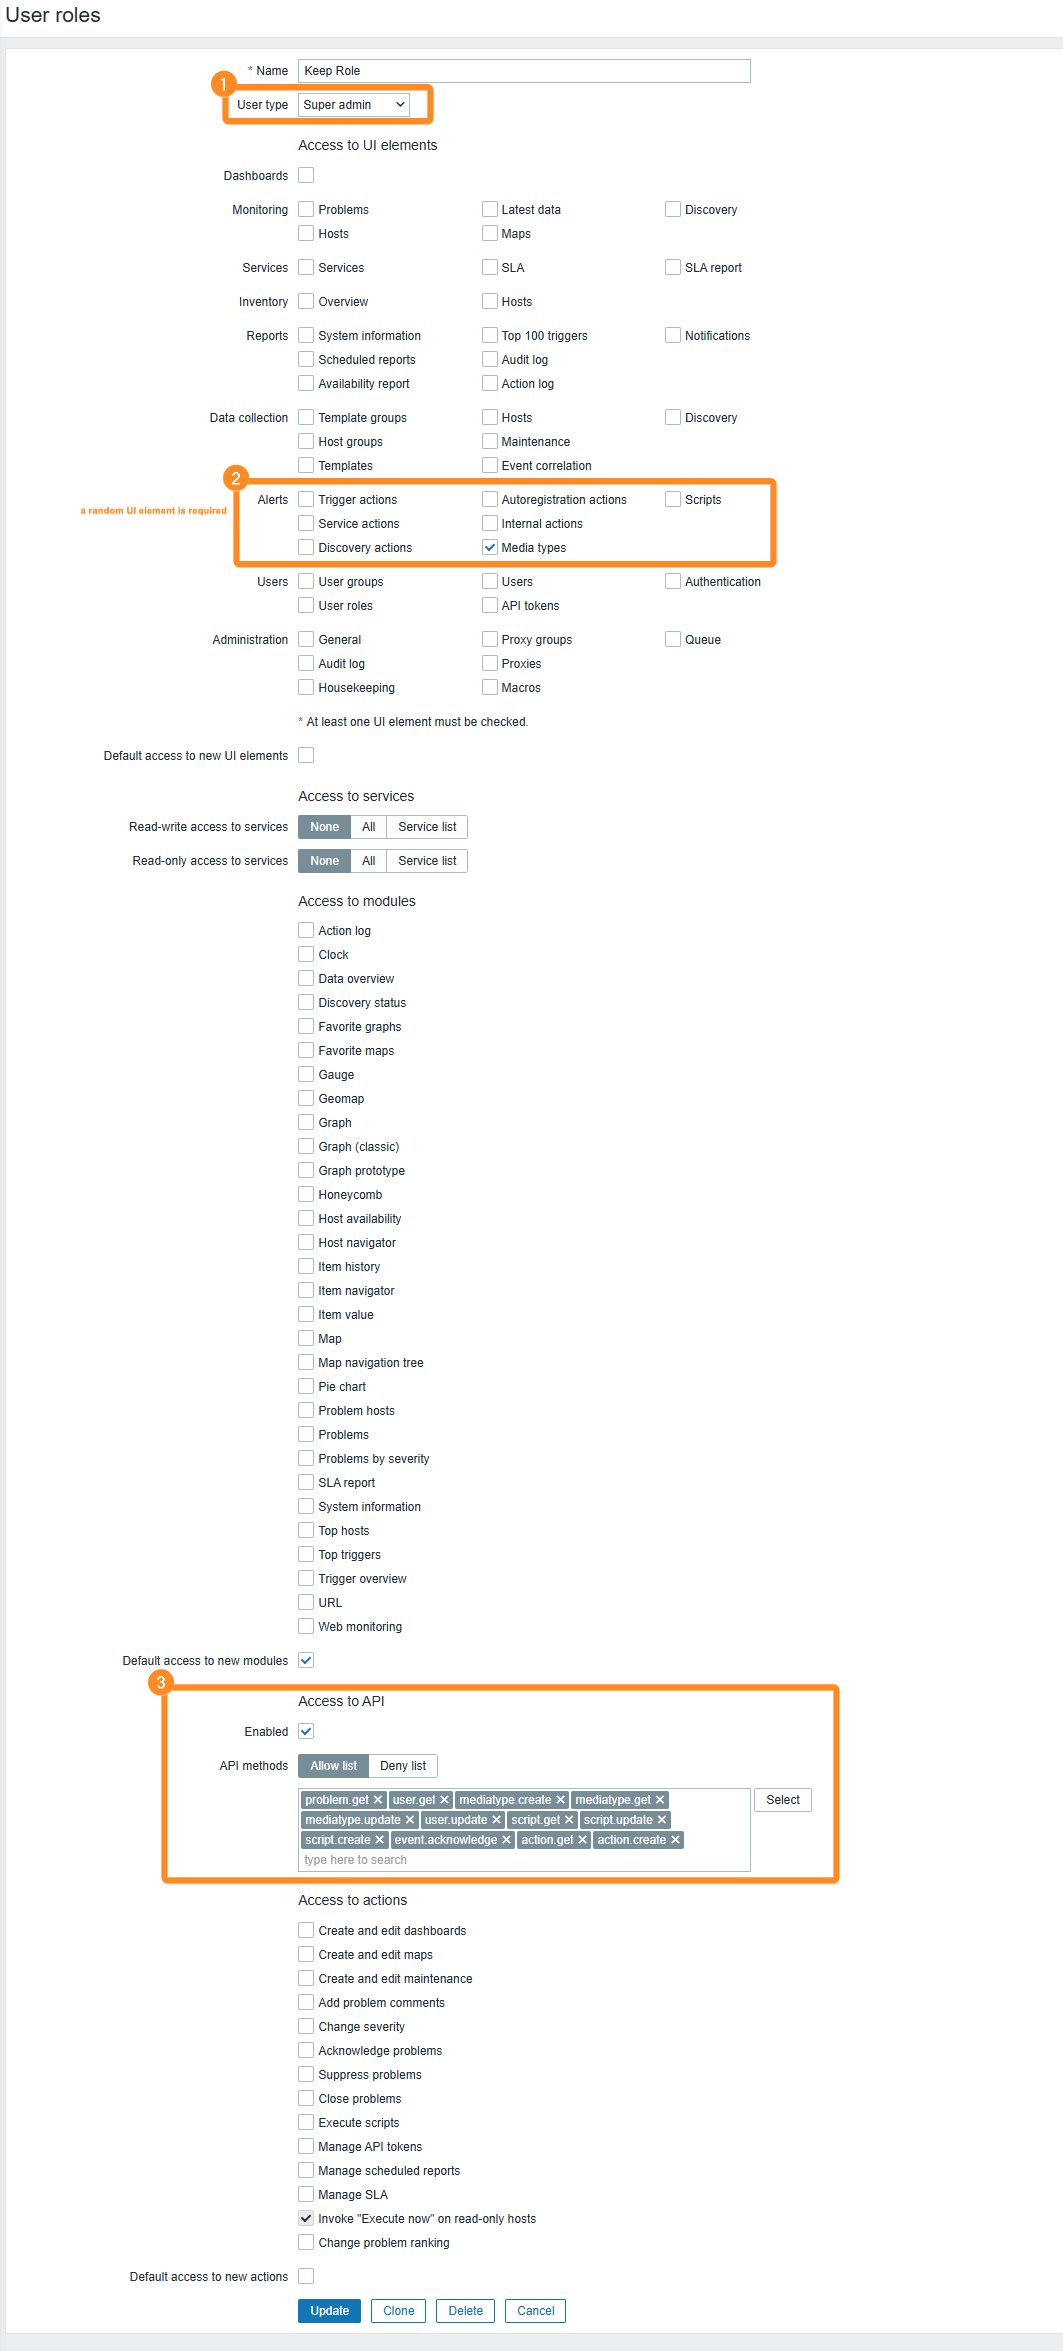
Create a User Role
- Navigate to
Users->User Rolessection. - In the top right corner of the screen, click
Create user role - Give the role an indicative name (e.g. Keep Role)
- In the
User typeselectbox, selectSuper Admin
- This is because some of the scopes we need are available to
Super Adminuser type only. See here
- Remove all the checkboxes from everything, except 1 random
Access to UI elementswhich is required for any role. - In the
API methodssection, selectAllow listand fill with these scopes:
action.createaction.getevent.acknowledgemediatype.createmediatype.getmediatype.updateproblem.getscript.createscript.getscript.updateuser.getuser.update
Create a user
- Navigate to
Users->Userssection. - Follow the instructions to add a new user. Give it an indicative username (e.g. KeepUser)
- In the
Permissionstab, select the Role you have just created. - Click
Add
Create API token
- Navigate to
Users->API tokenssection. - In the top right corner of the screen, click
Create API token - Give the API token an indicative name (e.g. Keep Token)
- Select the user you have just created
- Unselect the
Set expiration date and timecheckbox and clickAdd - Copy the generated API token and keep it for further use in Keep.
Notes
When installing Zabbix webhook, Keep automatically adds a new media type of
type Keep to your media types.After the new media type is added, Keep
automatically adds this mediatype as a media to all existing users, in order
to get all alerts incoming from Zabbix.
Webhook Integration Modifications
The automatic webhook integration grants Keep access to the following scopes within the Zabbix instance:mediatype.getmediatype.updatemediatype.createuser.getuser.update