Authentication
This provider requires authentication.- api_key: OpsGenie api key (required: True, sensitive: True)
- integration_name: OpsGenie integration name (required: True, sensitive: False)
- opsgenie:create: Create OpsGenie alerts (mandatory)
In workflows
This provider can be used in workflows. As “step” to query data, example:- failed-to-login-workflow.yml
- opsgenie-close-alert.yml
- opsgenie-create-alert-cel.yml
- opsgenie-create-alert.yml
- opsgenie_open_alerts.yml
Provider Methods
The provider exposes the following Provider Methods. They are available in the AI Assistant.- close_alert Close an alert (action, scopes: opsgenie:create)
- comment_alert Comment an alert (action, scopes: opsgenie:create)
Connecting with the Provider
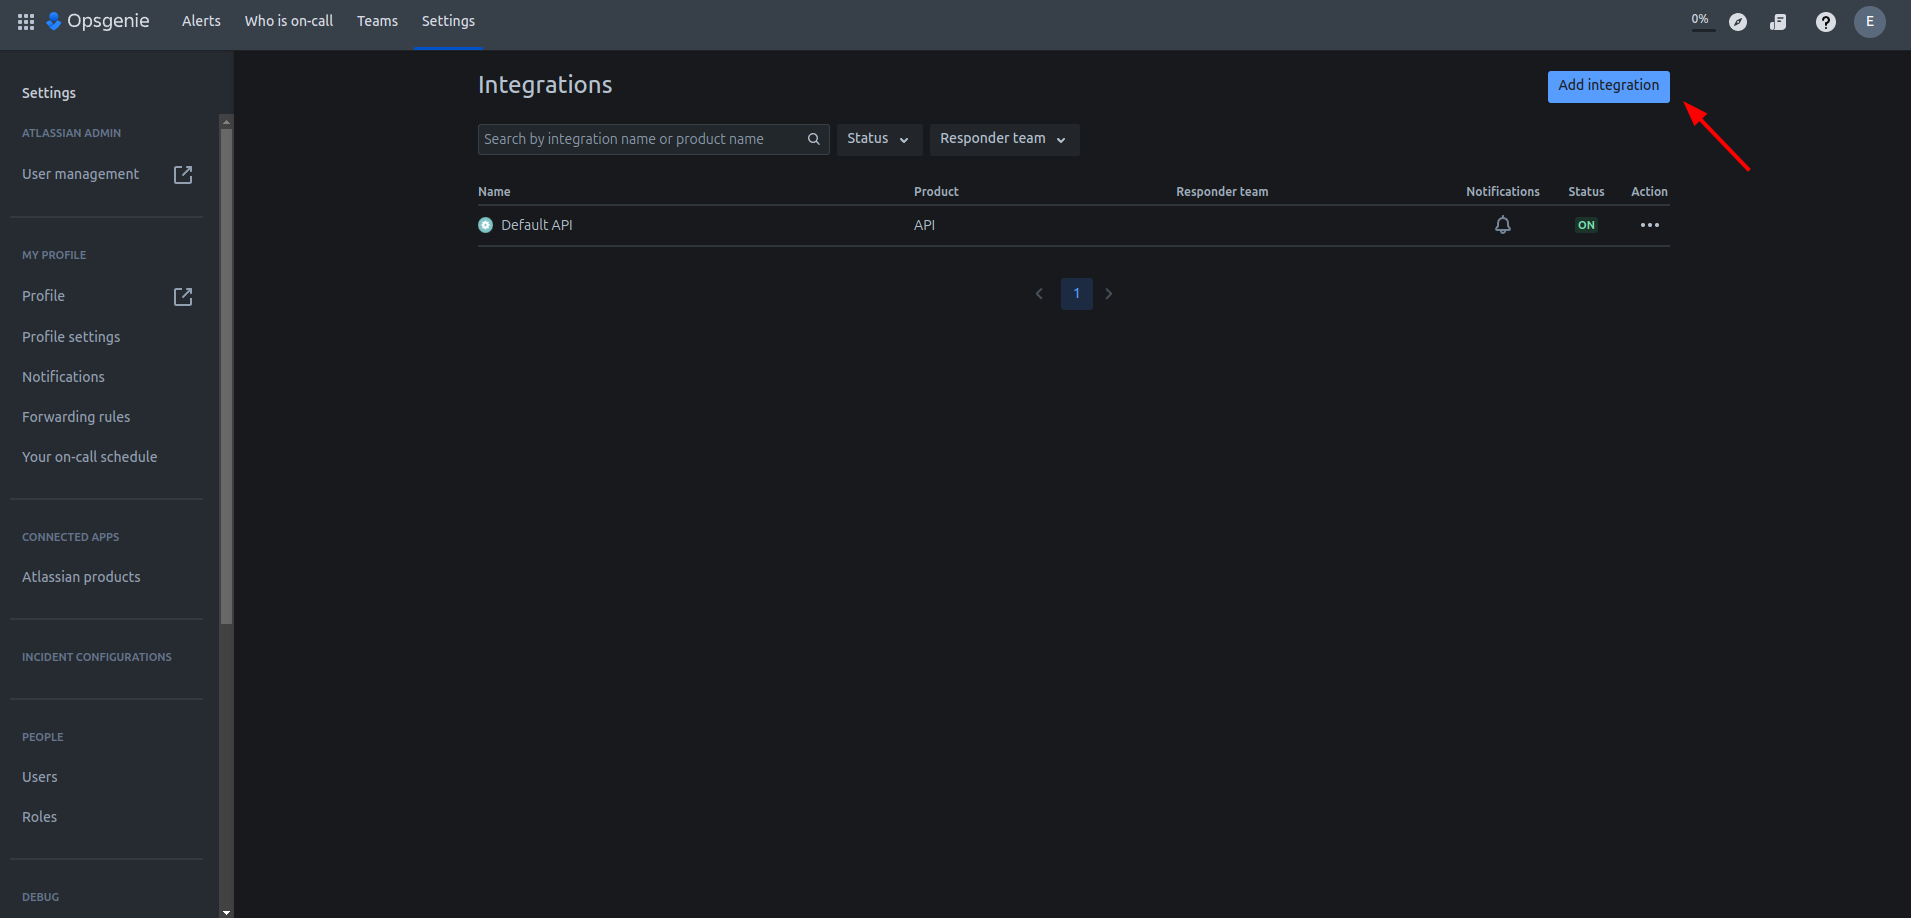
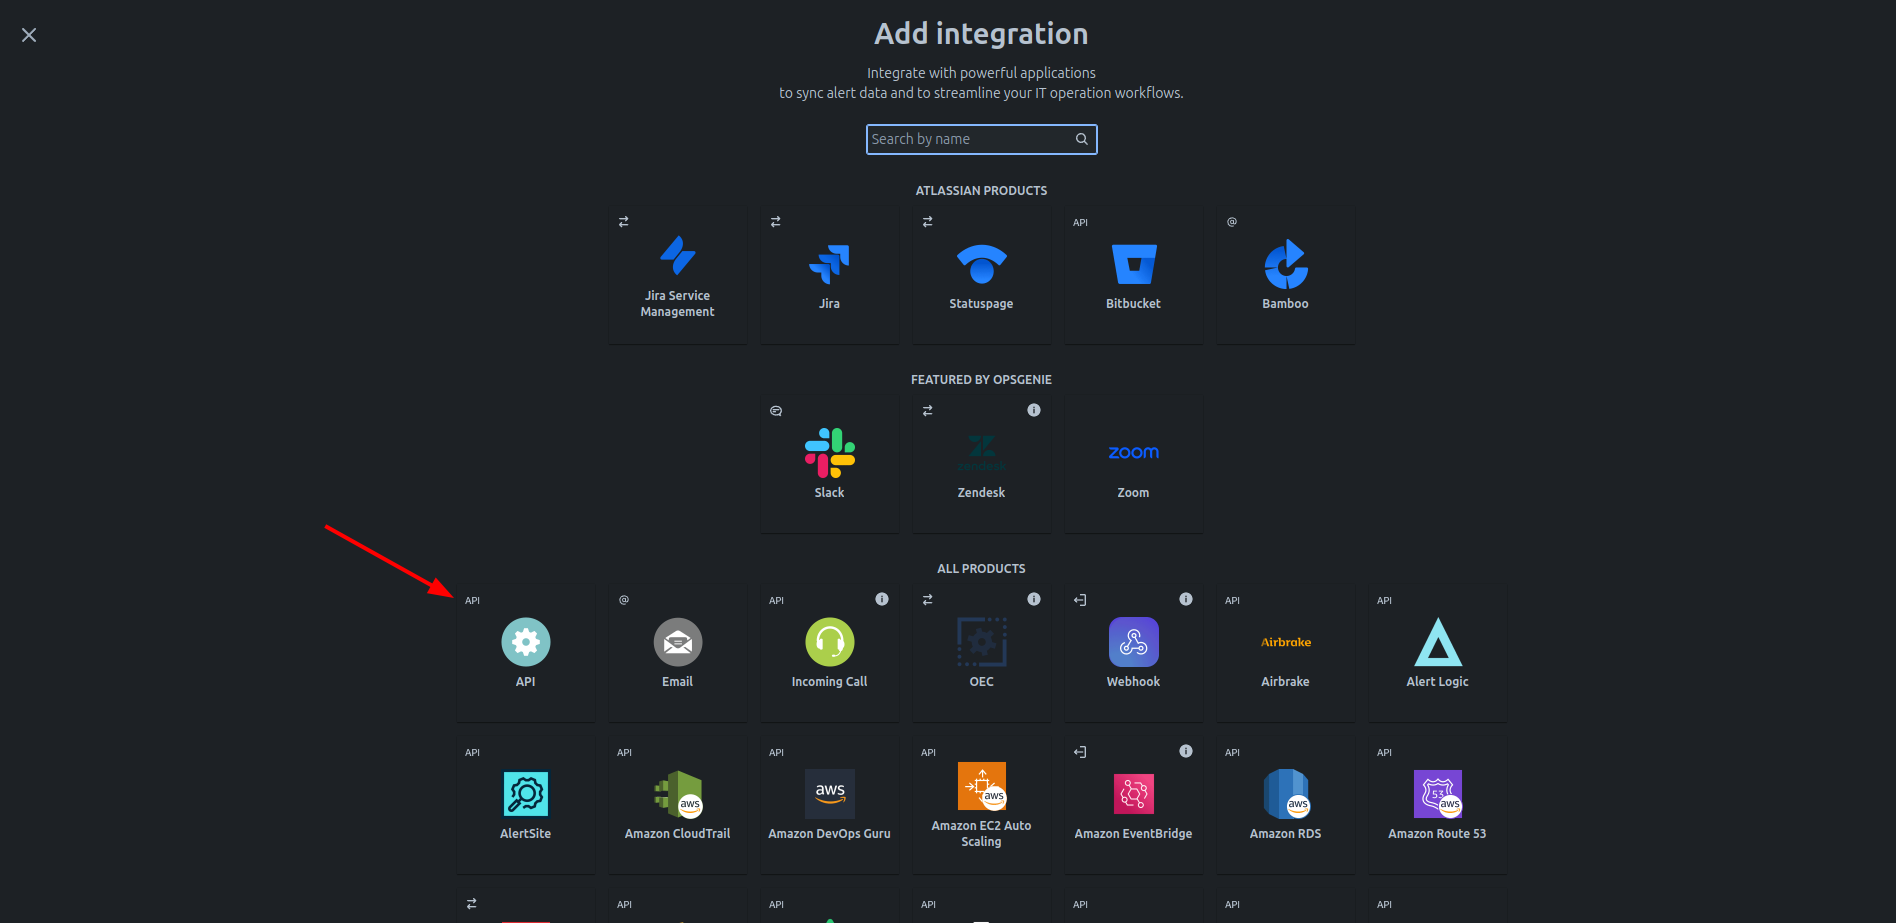
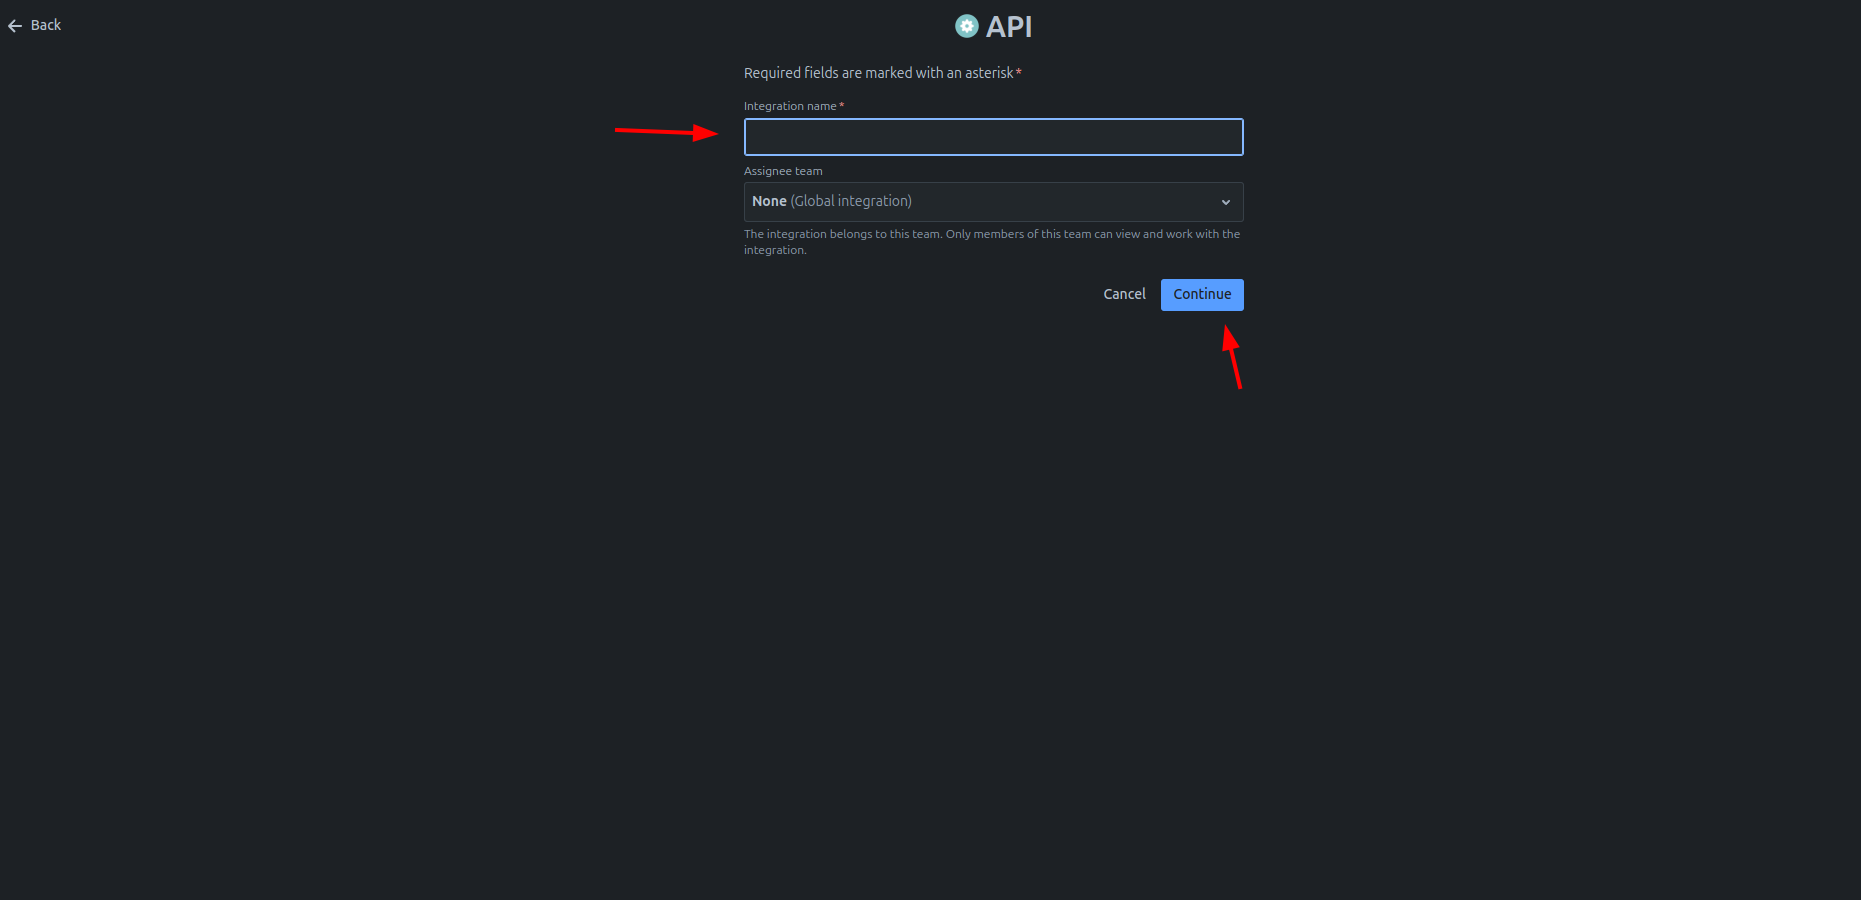
To use the Opsgenie Provider, you’ll need to provide the API Key and Integration Name from API Integration. You can create an API integration under Settings -> Integrations -> Add integration and search for API Integration. Select API and provide a name for the integration and click on continue. You can create an integration key under Settings -> Integrations -> Add integrationIf you are in the free tier, the integration key can be created under Teams ->
Your team -> Integrations -> Add Integration (API)

Useful Links
- How to create Opsgenie API Integration - https://support.atlassian.com/opsgenie/docs/create-a-default-api-integration/